This post contains affiliate links. I may earn a commission if you purchase through them at no extra cost to you.
I love quick, no-bake treats that hit sweet cravings without hours in the kitchen. I created this simple recipe to give me a rich, creamy snack that fits my low-carb routine and keeps hunger at bay.
These peanut butter fat bites combine 1/2 cup natural peanut butter and 1/2 cup virgin coconut oil for a silky base. The mix sets fast in the fridge, so I can enjoy a satisfying dessert in minutes.
Every batch delivers a smooth, consistent texture that melts on the tongue. I find these butter fat treats help me manage daily sugar without feeling deprived, and they store well for snacking all week.
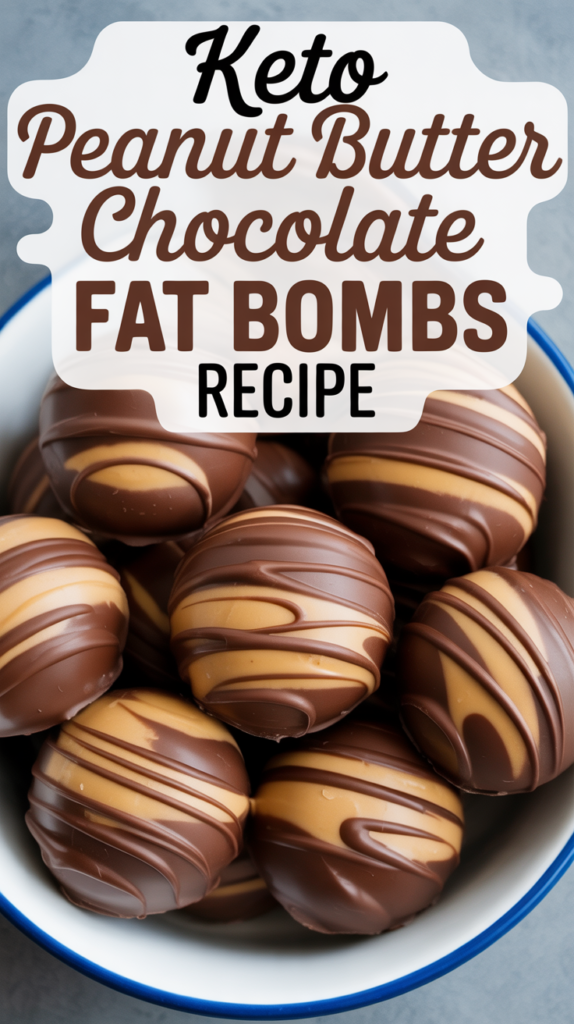
Why Keto Chocolate Peanut Butter Fat Bombs Are the Ultimate Treat
I find these rich little treats rescue me the moment a dessert craving hits. They pack concentrated energy and satisfy a sweet tooth without derailing my goals.
These fat bombs are high-fat morsels that help me stay steady and curb appetite between meals. For anyone following a keto plan, a well-made fat bomb can feel like a godsend when cake or cookies call your name.

- They act as a quick, portable snack that keeps me full and focused.
- The peanut butter chocolate pairing gives a rich, creamy texture that melts in the mouth.
- These recipes are easy to make and work well as a daily treat to manage cravings.
- Use high-quality chocolate and butter chocolate blends for the best flavor and texture.
| Benefit | Why it matters | Result |
|---|---|---|
| High energy | Concentrated fats provide slow-burning calories | Longer satiety |
| Rich flavor | Combines chocolate fat with nutty notes | Craving control |
| Easy prep | Simple recipes require few ingredients | Go-to portable treat |
Understanding the Role of Fat Bombs in a Low Carb Lifestyle
I learned that smart snacking makes it easier to stick to a low carb lifestyle all week. Small, dense treats give steady energy and help me avoid sugary pitfalls when I am busy or short on time.

Benefits of Healthy Fats
Healthy fats provide a lasting fuel source when carbs are limited. A single serving can range from about 7 to 50 grams of fat, so I choose portions that match my goals.
These snacks also add protein and fiber, which help stabilize blood sugar and support a balanced diet. For me, that means fewer cravings and better focus during long days.
Managing Sweet Cravings
When a dessert urge hits, well-made bomb recipes deliver satisfaction with minimal carbs. Many fat bomb recipes contain only 1g net carbs per serving, so I keep daily carbs in check while enjoying a treat.
- Helps the body switch to burning keto fat for fuel.
- Keeps you full and reduces constant snacking between meals.
- Designed to fit macros and support energy on the go.
Essential Ingredients for Your Homemade Fat Bombs
Start with high-quality basics to turn simple components into a decadent snack. I keep the list short so every batch comes out smooth and consistent.
Here are the exact ingredients I use for reliable results:
- 1/2 cup natural peanut butter (creamy)
- 1/2 cup virgin coconut oil
- 1/2 cup softened butter or 4 oz cream cheese (your choice)
- 1/3 cup powdered monk fruit or erythritol sweetener
- 1 tsp real vanilla extract
- 4 ounces sugar-free dark chocolate chips
| Ingredient | Role | Why it matters |
|---|---|---|
| Peanut butter (1/2 cup) | Base flavor & cream | Adds richness while keeping carbs low |
| Coconut oil (1/2 cup) | Healthy oil | Helps the bomb set and melt properly |
| Sugar-free chips (4 oz) | Coating | Creates a firm, chocolate-style shell without sugar |
I like to print this ingredient card before I start. It keeps measurements exact and my peanut butter fat treats consistent every time.
Preparing the Creamy Peanut Butter Filling
Good texture begins in the bowl; I focus on blending until the filling feels silky and even. Gather the measured ingredients and set a large bowl on the counter so everything is within reach.
Achieving a Smooth Consistency
Follow these steps to create a stable, scoopable center that holds shape yet melts when eaten.
- Combine 1/2 cup of peanut butter, 4 ounces of cream cheese, and 1/2 cup of softened butter in a large mixing bowl.
- Use a hand mixer on medium speed and blend until the mixture is completely smooth with no lumps of peanut or butter.
- Add 1 tablespoon of vanilla extract and your preferred sweetener, then mix for about 5 minutes to reach a creamy consistency.
- Fold in 1 tablespoon of melted coconut oil so the filling will set properly once chilled.
- Scoop uniform portions using a standard tablespoon; this keeps each piece consistent in size and protein content.
| Step | Action | Purpose |
|---|---|---|
| Mix ingredients | Combine in a medium bowl and beat 5 minutes | Create a smooth, homogenous mixture |
| Incorporate oil | Add coconut oil and blend until even | Helps filling set and improves mouthfeel |
| Portion | Scoop with a tablespoon into uniform pieces | Ensures consistent size, protein, and fat per serving |
Shaping and Setting Your Keto Snack Recipe
Careful scooping and chilling are the two steps that make this snack look and feel professionally made.
After I finish mixing the creamy peanut butter filling, I use a 1 1/2 tablespoon scoop to form uniform balls. I place each round on a parchment-lined baking sheet so they stay tidy.
I slide the tray into the freezer for 30 minutes. Thirty minutes is the perfect amount of time to make the mixture firm enough for the coating step.
- Use a 1 1/2 tablespoon scoop for even, consistent sizes.
- Freeze the tray for at least 30 minutes so the butter and coconut oil hold shape.
- Cold balls are easier to coat and give the best cream-to-shell balance.
- Keeping portions uniform helps control carbs and calories per serving.
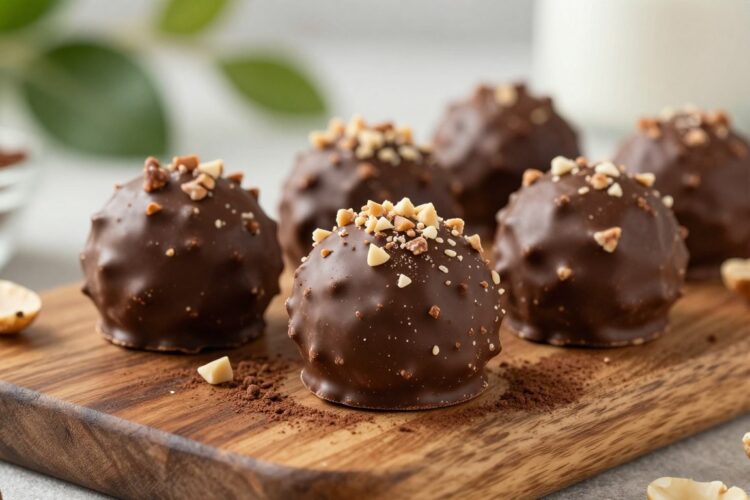
Once the balls are firm, they are ready for the final chocolate coating. I find that this shaping process makes these butter fat bombs look uniform and beautiful when plated.
Mastering the Chocolate Coating Process
Getting a smooth coating takes a few precise steps, but the payoff is a perfect bite. I walk through choosing the right sugar-free chips and the technique I use to cover each chilled center evenly.
Choosing Sugar Free Chocolate
I melt 4 ounces of sugar-free chips in a double boiler or microwave until the mixture is glossy and smooth. If using a microwave, heat in 20-second bursts and stir between bursts to avoid burning.
Techniques for Even Coating
Work on a clean, chilled tray lined with parchment. Use a fork to roll each chilled peanut ball into the melted chocolate so the shell stays thin and even.
- Melt chips for about 2 minutes total, stirring until the mixture is perfectly glossy.
- Dip each ball with a fork, letting excess drip before placing it back on parchment.
- Drizzle extra chocolate with a tablespoon for a decorative finish, then let set.
| Method | Time | Tip |
|---|---|---|
| Double boiler | 5–7 minutes | Gentle heat keeps mixture smooth |
| Microwave | 1–2 minutes | Short bursts prevent scorching |
| Finishing | Set time 10–15 minutes | Chill briefly for a crisp shell |
Tips for Achieving the Perfect Melt in Your Mouth Texture
A silky, melt-in-your-mouth finish comes from the balance of soft oils and a cool set. I rely on a high ratio of coconut oil and butter in the peanut butter mixture to get that creamy, rich mouthfeel.
Always chill the tray for at least 60 minutes so the centers firm up but remain soft at room temperature. I keep finished pieces in the freezer or refrigerator until I am ready to eat them.
- Use high-quality coconut oil and butter for maximum creaminess in the bowl.
- Chill for 60 minutes so the chocolate peanut coating snaps while the center stays smooth.
- If the mixture feels too soft, pop the bowl back into the freezer for a few minutes to firm it.
- Keep treats cold to preserve shape and that instant dissolve-on-the-tongue sensation.
| Step | Time | Why it helps |
|---|---|---|
| Initial chill | 60 minutes | Sets the coconut and butter so centers are creamy |
| Coating | Few minutes | Thin chocolate fat shell adds crisp snap |
| Storage | Ongoing | Freezer or fridge keeps texture and limits sugar bloom |
Proper Storage and Handling for Freshness
A simple storage routine keeps my homemade snacks tasting fresh and holding their shape. Because the coconut oil base softens at room temperature, proper storage is essential for great texture and flavor.
Freezer Versus Refrigerator Storage
I store my fat bombs in an airtight container in the freezer for up to 3 months. This keeps the center firm and prevents the shell from softening during warm days.
If I plan to eat them within a week or two, I use the refrigerator. In the fridge they stay fresh for about 1 to 2 weeks when covered tightly.
- Use a 1 cup capacity container for a standard batch to save space.
- Keep the container sealed to stop the peanut butter fat from picking up fridge odors.
- Handle each bomb straight from the freezer — they are easier to dip or plate when cold.
| Storage | Duration | Tip |
|---|---|---|
| Freezer | Up to 3 months | Store in airtight container for best texture |
| Refrigerator | 1–2 weeks | Seal tightly to avoid scent transfer |
| Counter | Short term | Keep only briefly; coconut oil melts at room temp |
Customizing Your Low Carb Chocolate Truffles
You can customize these truffles to suit your taste and keep net carbs low. I often add a pinch of sea salt to the peanut butter mixture to make the chocolate notes pop.
Try swapping chips for extra-dark or white-style sugar-free varieties. A dash of cinnamon or vanilla lifts the aroma and pairs well with cream centers.
For texture, I mix in chopped nuts, shredded coconut, or crushed chia for extra fiber. I always check that any additions are sugar-free and fit my low carb diet so net carbs stay within goals.
- Keep sweetener keto-friendly to protect your blood sugar and net count.
- Add flax or chia seeds for fiber and a slight crunch.
- Use sea salt or toasted nut pieces for contrast and flavor depth.
| Mix-in | Carb impact | Flavor note |
|---|---|---|
| Chopped nuts | Low | Toasty, crunchy |
| Flax or chia | Very low | Nutty, adds fiber |
| Sea salt or cinnamon | Negligible | Enhances chocolate fat and cream balance |
Enjoying Your Guilt Free Dessert Experience
These make-ahead treats sit in my freezer and save me from sugary impulse snacks. They take just minutes to portion, so I can grab a single snack and stay on track with my keto plan.
I like to print this recipe and share it with friends who want a low net carbs dessert. Each bomb is rich with peanut butter chocolate and glossy chocolate coating, yet easy to store and serve chilled.
Keep pieces cold for best texture and enjoy every bite of this butter chocolate delight. I hope you love this simple, satisfying solution to evening cravings.