
This post contains affiliate links. I may earn a commission if you purchase through them at no extra cost to you.
I love a warm, cheesy loaf that tastes like classic garlic bread but fits a low carb lifestyle. My quick recipe yields a crispy, cheesy, and garlicky side in under 40 minutes, perfect for busy weeknights.
This version uses 2 1/2 cups shredded mozzarella and 2 oz cream cheese for a rich base. I mix 1 1/2 cups super-fine almond flour with 3 large eggs and 1 teaspoon baking powder to form the dough that bakes golden in the oven.
Every bite mimics the texture of traditional bread while keeping carbs low. With fresh garlic butter and simple ingredients, this easy dish pairs beautifully with Italian meals and family dinners.
Why This Keto Garlic Bread Is a Game Changer
My tested low carb loaf delivers a golden, cheesy crust with a soft, slightly chewy center. It browns crisp on the outside yet stays moist inside, giving a texture that truly feels like traditional bread.
The secret is the dough: cream cheese and shredded mozzarella combine to form a sturdy, elastic base that outperforms many low carb recipes. That ratio creates structure and a rich, melty interior every time.
The garlic butter topping pulls the whole dish together. I brush a warm, aromatic butter over the loaf right after baking. The result is a garlicky, buttery finish that makes this recipe stand out.
- I find this loaf achieves a golden, crispy exterior while remaining soft and chewy inside.
- Unlike other low carb options, the dough mimics traditional loaves without excess carbs.
- Serve it fresh out of the oven as a side for any meal—this dish is versatile and crowd-pleasing.

Essential Ingredients for Your Low Carb Garlic Bread Recipe
The texture and flavor of this low carb loaf hinge on a few simple pantry choices. I pick components that give stretch, structure, and a golden crust without excess carbs.
Choosing the Right Almond Flour
I use 1 1/2 cups of super-fine almond flour to keep the dough smooth and non-gritty. I recommend a finely milled brand like Wholesome Yum for consistent results.
Selecting Your Mozzarella
For the best dough, measure 2 1/2 cups of shredded low-moisture, part-skim mozzarella. Combine that with 2 oz cream cheese so the mixture becomes stretchy and workable.

- In a small bowl, mix 1 1/2 cups almond flour and 1 teaspoon baking powder for even distribution.
- Use 3 large eggs to bind the dough and give the loaf chew and lift.
- Add 1/2 cup grated parmesan cheese for a savory, golden crust when baked.
- If needed, a touch of coconut flour works as a nut-free swap, though almond flour gives the best flavor.
- Every ingredient from the garlic butter to the cheese shapes the final loaf, so measure cups and teaspoons precisely.
Preparing the Perfect Cheesy Dough
I start by melting 2 1/2 cups shredded mozzarella and 2 oz cream cheese. I microwave them for 90 seconds and stir halfway so the mixture is smooth and elastic.
While the cheese warms, I pulse 1 1/2 cups almond flour, 1 teaspoon baking powder, and 3 large eggs in a food processor. This creates a fine, even flour-egg mix that forms the dough quickly.
- I add the warm cheese to the food processor immediately so the dough pulls together.
- If the dough feels sticky, I chill it for 15–30 minutes to make shaping easier.
- I oil my hands and shape the dough into a tight disc to prevent sticking and get a clean form.
- I keep a small bowl ready for seasonings and melted butter for the garlic butter step later.
These simple prep steps make the dough easy to work with and ensure the final bread has a light, cheesy crumb. Follow the instructions and you’ll have a reliable base for the rest of the recipe.
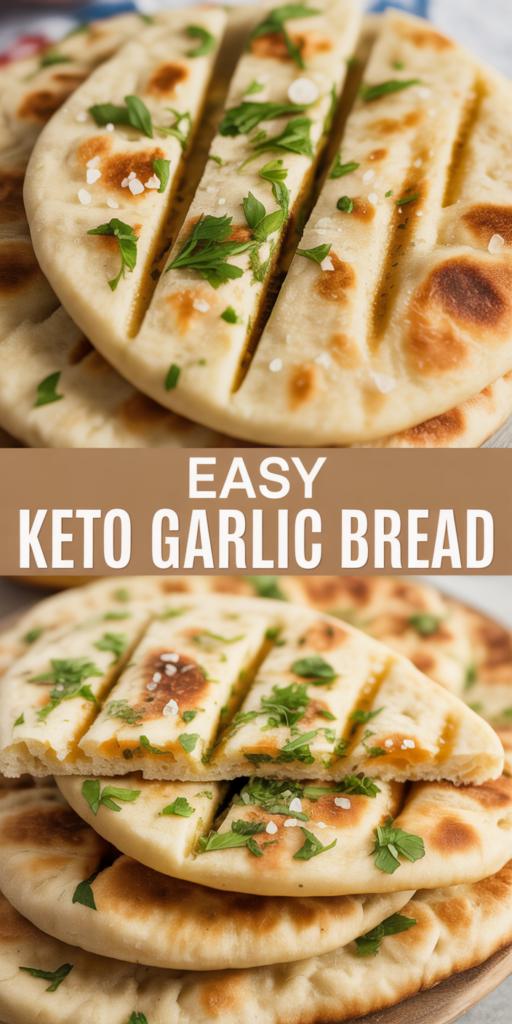
Shaping and Scoring Your Bread
Shaping the loaf properly sets you up for a perfect pull-apart finish every time. I shape the warmed dough into a tight disc on a piece of parchment so it bakes evenly and holds its form.
.
Line a baking sheet with parchment paper before you transfer the dough. This prevents sticking and makes cleanup simple.
Creating the Pull-Apart Effect
I use a very sharp knife to score the dough in a grid about one inch apart. Cut deep but stop before you go all the way through so the loaf stays connected.
- I score in a grid pattern to let the cheese and garlic butter seep into every cut.
- Place the shaped dough on the prepared paper and keep it ready for the topping.
- Use a small bowl for the garlic butter mixture so brushing is quick and neat.
- Finish by sprinkling extra parmesan cheese on top before baking for a golden finish.
Mastering the Garlic Butter Topping
The finishing butter mixture brings deep savory notes and a crisp, golden top to every slice.
In a small bowl I whisk 2 tablespoons melted butter with 1/2 teaspoon Italian seasoning and 1/2 teaspoon garlic powder. I stir until the flavors meld and the aroma rises.
Before baking, I brush the mixture generously over the scored dough so it seeps into each cut. Then I tuck 1 1/2 cups shredded mozzarella into the slots for a gooey center.
- I avoid placing cheese at the very edge to stop seepage onto the pan.
- I recommend using high-quality butter for a richer finish and better browning.
- Mixing in a small bowl keeps the blend smooth and easy to brush across the top.
- This final step locks in flavor, creates a golden crust, and makes the pull-apart pieces irresistible.
Baking for That Golden Crispy Texture
A steady 350°F (176°C) in the oven is my starting point for an even bake. I preheat first so the dough begins to set as soon as it hits the heat.
I bake the loaf for 15 to 18 minutes. Watch the final two minutes closely so the garlic butter does not burn and the top turns a deep golden brown.
Use a sheet lined with parchment paper to help the loaf brown evenly and prevent sticking. The almond flour and baking powder give the dough lift while keeping it light.
- I know the bread is done when the cheese bubbles and the top is richly browned.
- I set a timer and check between 15 and 18 minutes for perfect crispiness.
- Sprinkling extra parmesan on top before baking adds a salty, crunchy finish.
- Let the loaf rest a few minutes after removing it from the oven so the cheese sets and pieces pull apart cleanly.
This simple baking routine produces a crunchy exterior and a soft, melty center every time. It makes the whole recipe easy to rely on for weeknight dinners and special meals.
Tips for Storing and Reheating Your Leftovers
Keeping extra loaf slices fresh is easy with a few simple storage steps. Follow a clear routine and you’ll enjoy the same melty cheese and crisp top later on.
Refrigeration Guidelines
I store leftovers in an airtight container in the refrigerator. This keeps the loaf fresh for up to 3 to 4 days.
When I plan to serve slices within a few days, the fridge preserves the texture and the flavor best. Wrap individual servings to make reheating quick.
Freezing for Later
If I want to keep a larger batch, I freeze portions for 3 to 6 months. I always thaw the slices before reheating to protect the chewy almond-flour crumb.
To reheat, I preheat the oven and warm slices until the cheese is melted and the crust becomes crisp again. Reheating in the oven restores the best texture; the microwave works in a pinch for a quick, hot serving in minutes.
- I recommend airtight storage in the fridge for up to 4 days to maintain quality.
- Freeze extra portions for up to 6 months and thaw fully before reheating.
- Oven reheating brings back a crunchy exterior better than the microwave.
- Each serving is packed with protein, so leftovers make a satisfying snack or side.
Enjoying Your Homemade Keto Side Dish
This cheesy pull-apart is an easy side that pairs well with pasta, soup, or a fresh salad. I serve it warm so the cheese stretches and the top stays golden.
I love that this keto garlic bread gives a true bread experience while keeping carbs low. You can tweak the garlic butter with herbs or red pepper flakes for a unique twist.
Store leftovers in an airtight container; they keep well for a few days and reheat nicely in the oven. For quick snacks, the protein-rich slices work great as a simple serving with a salad or soup.