This post contains affiliate links. I may earn a commission if you purchase through them at no extra cost to you.
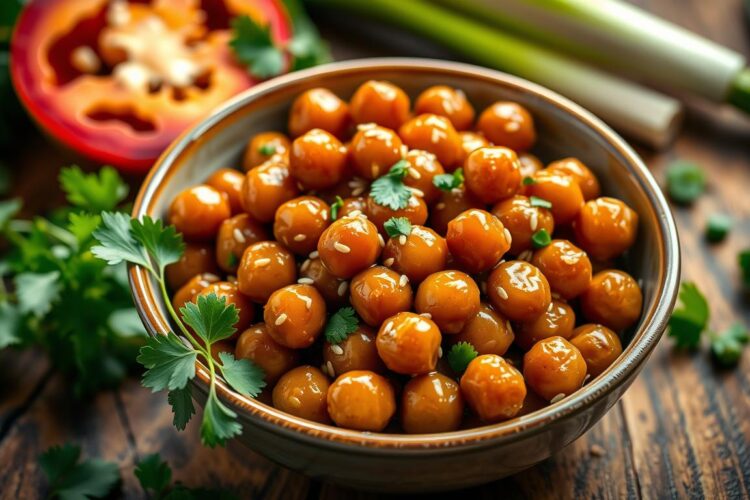
I reach for this one-pan recipe when I want a fast, Asian-inspired comfort dinner without heating the oven. In roughly 15 minutes I can turn pantry staples into a glossy, sticky sesame sauce that clings to each chickpea.
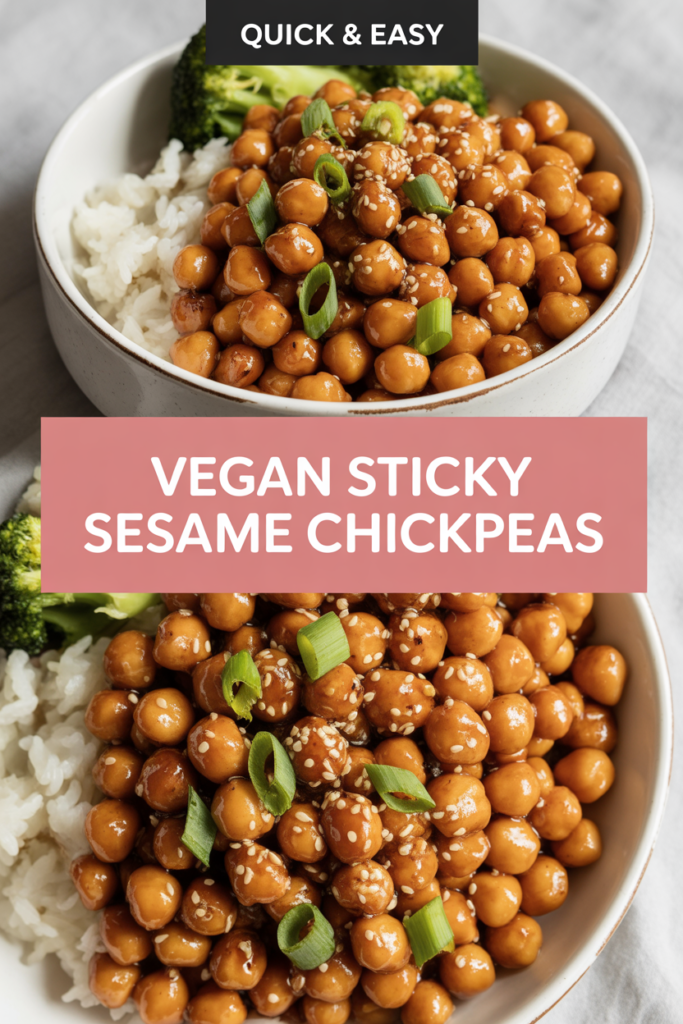
The flavor is sweet, savory, and a little nutty, and it shines when served over steamed white rice with broccoli florets. I finish the plate with sliced scallions and white sesame seeds for contrast.
This is my go-to for weeknight cooking and meal prep. I can make a batch, box it up, and eat it for lunches or dinners all week.
What you’ll learn here: key ingredients and substitutions, how to build the sauce, simple one-pan steps, plating suggestions, and storage tips so your dish stays bright and tasty.
Why I Make These Sticky Sesame Chickpeas on Busy Weeknights
Busy evenings call for food that’s fast, bold, and fuss-free — this pan meal hits all three. I want big flavor without spending time or making a mess.
Sweet, savory, and nutty sesame flavor in about 15 minutes
From opening a can to a glossy glaze, I have dinner ready in about 15 minutes. The blend of soy sauce, a splash of sesame oil, and a touch of sweetener gives deep flavor fast.
One-pan dinner that’s great for meal prep
I use one pan so cleanup stays quick. I often double the batch and portion it with rice and broccoli for grab-and-go lunches. Reheating keeps the sauce lively with a quick splash of water.
Budget-friendly pantry ingredients like canned chickpeas and soy sauce
Canned chickpeas provide affordable protein and fiber, so the meal feels filling. A few pantry staples—garlic, soy sauce, oil—turn into something that tastes restaurant-inspired without the cost.
- Fast: ready in minutes, ideal for weeknights.
- Simple: one pan, few dishes.
- Flexible: tweak sweetness, heat, or tang to suit cravings.

| Benefit | What I Get | Why It Matters |
|---|---|---|
| Cook time | ~15 minutes | Fast dinners mean less stress on busy nights |
| Cost | Low — pantry staples | Affordable ingredients stretch my grocery budget |
| Nutrition | Plant protein and fiber | Keeps me full between meals |
| Cleanup | One pan | Less time washing dishes, more time to relax |
Ingredients for the Best Sticky Sesame Chickpeas
A clear, measured ingredient list is what I use to get dinner on the table fast and predictable.
Chickpeas and cooking oil
2 (15-ounce) cans chickpeas, drained and rinsed.
1 tablespoon neutral cooking oil (avocado or canola) for the pan.
Sticky sesame sauce essentials
- 2 tablespoons soy sauce or tamari
- 3 tablespoons maple syrup (or packed brown sugar)
- 1 tablespoon rice vinegar
- 1 teaspoon toasted sesame oil
- 3 cloves garlic, minced
- 1 teaspoon fresh grated ginger
- 1 tablespoon cornstarch + 2 tablespoons water (slurry)
- 1/4 cup water or low-sodium vegetable broth (to loosen while simmering)
Serving components and garnishes
2 cups cooked steamed white rice and 3 cups broccoli florets (fresh or frozen) for serving.
Garnish with 2 scallions, chopped, and 1 tablespoon white sesame seeds.
Optional quick veggies: sliced bell peppers, snap peas, or mushrooms (add if you like more color).

| Ingredient Group | What I Use | Purpose |
|---|---|---|
| Pan base | 2 cans chickpeas, 1 tbsp neutral oil | Protein and quick sautéing |
| Sauce | Soy/tamari, maple syrup, rice vinegar, sesame oil | Balance salty, sweet, and nutty flavor |
| Thickener | Cornstarch slurry (1 tbsp + 2 tbsp water) | Creates glossy, clingy coating |
| Serve & finish | Rice, broccoli, scallions, white sesame seeds | Base, veg, and crunchy garnish |
Ingredient Measurements and Simple Substitutions
I keep a short list of swaps so dinner still comes together when I’m missing an item or cutting back on salt. Below I explain practical swaps I use and why they work.
Soy or tamari options
I use regular soy sauce for deep, salty flavor. For gluten-free cooking, tamari is my go-to — it tastes almost identical and works one-for-one.
If I need lower sodium, coconut aminos or low-sodium soy reduce sodium without losing umami. I also rinse canned beans to cut extra sodium before cooking.
Sweeteners: maple or sugar
I prefer maple syrup for its glossy finish and flavor. Brown sugar or regular sugar work too; if I use sugar, I add a splash of water while simmering so the glaze stays smooth.
Vinegar swaps and flavor add-ins
Rice vinegar gives a clean tang. In a pinch I use apple cider vinegar or a squeeze of lemon and adjust to taste. I’ll add chili flakes, orange zest, or extra ginger for a small flavor lift.
Thickener alternatives
Cornstarch is my default for a glossy cornstarch thickener. I swap arrowroot 1:1 if I need a cleaner finish. Make a small slurry mixture with cold water before stirring into the hot pan.
| Ingredient | My pick | Swap & note |
|---|---|---|
| Soy base | Soy sauce | Tamari for GF; coconut aminos for lower sodium |
| Sweetener | Maple syrup | Brown sugar or sugar; add extra water if using sugar |
| Acid | Rice vinegar | Apple cider vinegar or lemon juice, adjust to taste |
| Thickener | Cornstarch | Arrowroot 1:1; mix with cold water before adding |
Sticky Sesame Sauce: How I Build Big Flavor Fast
When I build the sauce, I focus on a simple formula that balances savory, sweet, tang, and aroma. That approach gives big flavor with few ingredients and little fuss.
Balancing salty soy, sweet maple, and tangy rice vinegar
I start with a base of soy sauce for depth, then add maple syrup for glossy sweetness. A splash of rice vinegar brightens the mix so it never tastes flat.
Garlic and ginger: the fragrant backbone
I mince garlic and grate ginger finely so they release flavor fast. They bloom best over medium heat, which keeps them fragrant without burning.
Sesame oil timing for max aroma
Toasted sesame oil is powerful, so I add a small drizzle at the end. That preserves the nutty aroma without turning bitter from high heat.
- I follow the salty + sweet + tangy + aromatic formula for balance.
- I taste and tweak: more maple if too salty, more vinegar if too sweet.
- Finish with a cornstarch slurry so the sauce thickens and clings.
| Element | Role | Quick tip |
|---|---|---|
| Soy / soy sauce | Umami backbone | Start small and taste |
| Maple / maple syrup | Sweet, glossy finish | Add to balance salt |
| Garlic & ginger | Aromatics | Medium heat, finely minced |
How I Make Vegan Sticky Sesame Chickpeas in One Pan
I keep the process simple: prep the slurry, build the sauce, and finish everything in the same pan. This quick routine keeps cleanup low and results predictable every time.
I start by draining and rinsing the chickpeas and setting them aside. In a small bowl I whisk cornstarch with water until the mixture is smooth — this slurry is what helps me make sticky, glossy coating.
I warm neutral oil in a pan over medium heat. I sauté garlic and ginger for about 1 minute over medium heat so they become fragrant without burning.
Next I add soy, maple, and rice vinegar to the pan and bring the sauce to a gentle simmer. When I see steady bubbles, I whisk the slurry into the mixture and stir for 30–60 seconds so it thickens with no lumps.
Finally I add the chickpeas and toss for 2–3 minutes until the glaze clings. My cue that the sauce is thick enough: it drags slightly when I run a spoon through and visibly clings to the beans. If it firms too much, a splash of water loosens it back into a glossy glaze.
| Step | Time | Pan cue | Quick tip |
|---|---|---|---|
| Prep slurry in a small bowl | 1 minute | Smooth mixture, no lumps | Use cold water for the slurry |
| Sauté aromatics over medium heat | 1 minute | Fragrant, not browned | Keep stirring to avoid burning |
| Simmer, whisk in slurry, coat chickpeas | 3–4 minutes | Sauce bubbles and clings | Add a splash of water if too thick |
Steamed Rice and Broccoli: My Go-To Way to Serve It
I usually build the bowl around a bed of hot rice so the sauce soaks in and tastes richer.
Rice base: white or brown
For comfort, I use steamed white rice — it’s soft and soaks sauce quickly.
When I want more chew and fiber, I pick brown rice; it holds up well to reheating and adds texture.
Broccoli: quick sides that keep dinner fast
Fresh florets steam in minutes. Frozen broccoli or a microwave-steamed bag is my weeknight shortcut.
Either option gives color and bright crunch without slowing the meal down.
I build bowls with rice first, then spoon on the sesame chickpeas and arrange broccoli on the side. The glaze drips into the rice and adds flavor to each bite.
Finish with chopped scallions and a sprinkle of white sesame seeds on top for color and crunch. Add extra veggies like bell peppers or snap peas if you want more variety.
| Component | My pick | Why I choose it |
|---|---|---|
| Base | Steamed white rice or brown rice | White soaks sauce; brown adds bite and fiber |
| Veg | Broccoli (fresh, frozen, or microwave) | Fast to cook; adds color and nutrients |
| Garnish | Chopped scallions + white sesame seeds | Freshness and crunch on top |
Meal Prep Tips for Sticky Sesame Chickpeas
Making extra in one go saves me time and keeps my lunchbox interesting all week. I treat this recipe as true meal prep: cook once, eat several times.
How I portion rice, broccoli, and chickpeas for grab-and-go lunches
I spoon cooked rice into one side of my containers and pack broccoli next to it. I place the chickpeas on top or in a separate compartment so the glaze stays distinct from the rice until ready to eat.
I often double the batch in the same pan when I’m already cooking. It takes only a few extra minutes and cuts my weekday work in half.
Keeping the sauce sticky after reheating
Store portions airtight in the fridge for up to 4–5 days. The sauce may thicken or dry slightly during fridge days; that’s normal.
Reheat in short microwave bursts, stirring between them, or warm gently on the stovetop. Add a splash of water as you heat to loosen the sauce and keep the glaze glossy and clingy.
- Make pre-cooked rice and quick-steamed broccoli so assembly is under five minutes.
- Microwave in 60–90 second bursts, stir, add water if the sauce looks dry.
- Double the recipe in one pan to maximize effort-versus-yield.
| Task | Timing | Note |
|---|---|---|
| Portioning | 5 minutes | Rice one side, broccoli beside, chickpeas on top or separate |
| Storage | 4–5 days | Airtight containers prevent drying during fridge days |
| Reheating | 2–3 minutes | Add a little water to revive the sauce and keep texture |
Easy Variations When I Want to Switch It Up
A tiny change to the sauce gives me an entirely new bowl without adding time or dishes. I keep the same quick pan method and swap one or two elements to shift the mood.
Orange brightened chickpeas
I add fresh orange zest and a squeeze of juice to the sauce for a bright, sweet-tangy twist. Start with 1 teaspoon zest and 1 tablespoon juice, then taste and tweak the maple or vinegar so the balance stays right.
Spicy sesame chickpeas
For heat, I stir in chili flakes or a swirl of sriracha while the sauce simmers. A little goes far, so I add a quarter-teaspoon, taste, then increase if I want more heat. This keeps garlic and ginger front and center while lifting the flavor.
More veggies in the pan
I sauté sliced bell peppers, snap peas, or mushrooms right after garlic and ginger. Cook those until just tender, then pour the sauce in to simmer and thicken. Adding vegetables stretches the meal and makes meal prep more colorful.
- I keep the core method: simmer sauce, whisk in slurry, then coat chickpeas until glossy.
- Taste and adjust sweetness or vinegar when you add orange or spice so the sauce stays balanced.
| Variation | Key Add | Quick Tip |
|---|---|---|
| Orange | Orange zest + juice | Start small; balance with maple or vinegar |
| Spicy | Chili flakes or sriracha | Add gradually to control heat |
| Veg-forward | Bell peppers, snap peas, mushrooms | Sauté after garlic & ginger, then add sauce |
Storage and Make-Ahead Notes I Rely On
I lean on simple make-ahead steps so dinner comes together in minutes with minimal cleanup. Prep rice ahead and keep broccoli ready, then finish the chickpeas in one pan. Total planning means about 15 minutes minstotal and about 15 minutes minscook at the stove for a fresh batch.
Cool leftovers, then store airtight in the fridge for up to 4–5 fridge days. For longer storage, freeze portions for up to two months and thaw overnight. Rinsing canned chickpeas cuts sodium and keeps the bowl lighter.
If the sauce tightens during storage, add a splash of water while you reheat to bring back the glossy finish. I reheat in short bursts and stir once or twice.
Treat this as a back-pocket recipe. I rotate these recipes all week, swap in veggies, and change aromatics like garlic and oil so it never feels dull.