This post contains affiliate links. I may earn a commission if you purchase through them at no extra cost to you.
I make this as my go-to healthy weeknight dinner when I want bold Mexican flavor without assembling individual wraps. It is a single baking-dish meal that saves time and cuts cleanup.
I mix rice, spices, protein, and veggies in one dish, stir, cover, and bake at 400°F until the rice soaks up the liquid. Then I finish with cheese and let it rest 5–10 minutes for the best texture.
This recipe is naturally gluten-free because it skips tortillas. I note label checks and simple swaps, like cauliflower rice, so you can keep it safe for gluten-free diets.
It feeds a family, portions well for lunches, and reheats cleanly. In the steps ahead I give exact measurements, smart swaps, and timing tips so your texture turns out right.
Why I Make This Healthy, Gluten-Free Chicken Burrito Casserole on Busy Weeknights
I turn to this simple baked dish when weeknight minutes are tight but I still want bold, familiar taco flavors. It’s quick to assemble and gentle on prep, so dinner is ready while I handle other tasks.

Big burrito flavor without rolling burritos
I layer spices, salsa-style tang, beans, and cheese right in the baking dish to get true burrito notes without wrapping. This saves real weeknight time and delivers the flavors of stuffed rolls in one easy bake.
High-protein comfort food with minimal cleanup
The recipe centers on chicken and beans for steady protein and filling comfort. I stir everything in one large dish so there are fewer bowls and the sink stays clear.
Family-friendly heat level (with easy ways to spice it up)
I keep the base mild for kids with green chiles and moderate seasoning. Adults can add hot sauce, jalapeño, or extra salsa at the table for more kick.
Perfect for meal prep and leftover lunches
After baking the casserole firms up as it rests, so portioning for lunches takes just a few minutes. It reheats well and holds texture, which makes weekday packing fast.
| Option | Why I use it | Prep time |
|---|---|---|
| Rotisserie or pre-cooked | Fast, flavorful, minimal slicing | 5–10 minutes |
| Raw breasts (baked in dish) | Fresh texture; works if you want less salt | 10–15 minutes prep, longer bake time |
| Leftover cooked meat | Great for using leftovers and saving time | 3–5 minutes |
Next I cover exact ingredient choices, rice swaps, and quick flavor boosts that don’t add steps or dirty more pans.
What You’ll Need for One-Pan Chicken Burrito Casserole
For this dinner I gather a few pantry staples and a protein to build bold, baked taco-style flavors with minimal fuss.
I list the core ingredients below and note easy swaps so you can use what you have on hand.
Protein choices
- Cooked shredded chicken (leftover) — fastest prep.
- Rotisserie chicken — great flavor and saves time.
- Raw chicken breast — you can bake and shred it in the dish if you prefer to start from scratch.
Beans, veggies, and rhythm
Black beans add fiber and that burrito-bowl feel without wraps. You can use canned or drained home-cooked beans.
Key vegetables: red bell pepper, onion, and garlic. Dice them finer so they soften while the rice cooks.
Rice and cheese
Use uncooked long-grain white or parboiled brown rice. Brown rice needs more time and liquid; cauliflower rice is a low-carb swap and will reduce bake time.
Cheese picks: monterey jack for melt, cheddar for sharpness, or pepper jack for a spicy kick.
Liquid, flavor boosters, and extras
The liquid system—chicken broth plus tomato paste and green chiles—gives depth. Serve with salsa if you want extra brightness.
Optional add-ins: corn for sweetness, cilantro for freshness, and olive oil for a light finish.

| Item | Why use it | Swap/Note | Prep time |
|---|---|---|---|
| Cooked shredded chicken | Fast, minimal work | Rotisserie chicken works here | 3–5 min |
| Black beans | Texture and fiber | Any canned beans ok | 1–2 min |
| Rice (white/brown) | Fills and cooks in broth | Cauliflower rice = low-carb | White 25–30 / Brown 40+ |
| Cheese (Monterey Jack, cheddar) | Melt and flavor | Pepper Jack for heat | Scatter before serving |
Exact Ingredients and Measurements (Plus Easy Swaps)
I measure everything up front so the rice cooks evenly and the flavors balance.
Casserole base ingredients
- 4 cups cooked shredded chicken (about 1.5–2 lb cooked) OR 2 large raw breasts (poach, shred, then add).
- 1 cup uncooked long-grain white rice (or 1 cup long-grain brown—see notes below).
- 3 cups low-sodium chicken broth.
- 1 (14 oz) can black beans, drained and rinsed.
- 1/2 cup diced yellow onion, 1 diced red bell pepper, 3 cloves garlic minced.
- 1 cup frozen or fresh corn.
- 1 (4 oz) can mild green chiles, drained.
- 2 tbsp tomato paste, 1 tbsp olive oil.
- About 1 1/4 cups shredded cheese (Monterey Jack or cheddar).
Burrito-style seasoning mix I use
- 1 tbsp chili powder, 1 tsp ground cumin, 1 tsp smoked paprika, 1/2 tsp dried oregano.
- 1 tsp kosher salt and 1/2 tsp black pepper (adjust to taste).
Optional add-ins and what they change
- Corn (+ sweetness), extra peppers (+ crunch/brightness), tomato paste (+ depth and body).
- Extra beans boost fiber and stretch servings.
Optional toppings and swaps
- Sour cream, salsa, sliced avocado, chopped cilantro, and green onion for serving.
- For lighter goals: use 3/4 cup cheese or reduced-fat cheese for less fat with decent melt.
Gluten-free notes
Double-check seasoning packets, canned green chiles, broth, and salsa labels for gluten-free certification. Some brands use thickeners or flavor carriers that contain gluten.
| Ingredient | Amount | Why | Swap |
|---|---|---|---|
| Uncooked rice | 1 cup | Provides body; absorbs broth | Cauliflower rice (low-carb) — reduce liquid |
| Cooked shredded chicken | 4 cups | Fast prep; stable protein | 2 raw breasts (poach & shred in advance) |
| Black beans | 14 oz can | Texture and fiber | Extra corn or beans for vegetarian stretch |
| Shredded cheese | 1 1/4 cups | Melt and flavor | 3/4 cup reduced-fat cheese |
My Favorite One-Dish Setup for Minimal Cleanup
When I want dinner with minimal fuss, I set everything up so the oven does the work and the sink stays nearly empty.
Best baking dish size and why it matters
I use a 9×13-inch baking dish because it spreads the rice and other ingredients thin and even. That helps the grain cook through without crunchy edges or a raw center.
If you prefer a deeper dish, it will work but expect a longer bake. Thicker layers need more time for the liquid to absorb.
Foil vs. lid for even baking
I mix dry ingredients first, then pour whisked broth and tomato paste right into the baking dish and stir—no extra bowls necessary. Covering with foil traps steam so the rice cooks evenly.
A tight-fitting lid does the same job. I remove cover for the last 8–10 minutes so the cheese melts and turns lightly golden.
- Lightly oil or nonstick spray the dish to make cleanup easier and keep melted cheese from sticking.
- For potlucks, a disposable foil pan is handy; note thinner walls can bake faster, so watch time closely.
| Pan | Why I use it | Bake time note |
|---|---|---|
| 9×13-inch baking dish | Even spread, reliable cooking | Standard timing |
| Deeper casserole dish | Holds more, thicker layers | Add 10–15 minutes |
| Disposable foil pan | Easy transport, no dish return | May bake faster; monitor closely |
How I Make This One-Pan Chicken Burrito Casserole in the Oven
A fully hot oven is the secret to even rice cooking, so I preheat to 400°F before I touch ingredients. While it heats I dice onion and bell pepper, mince garlic, rinse black beans, measure uncooked rice, and shred the chicken if needed.
In my 9×13 baking dish I stir rice, veggies, and seasoning so the grains get coated evenly. Whisk chicken broth with tomato paste, green chiles, and olive oil until smooth, then pour the mixture over the rice base and stir to combine.
Mix vs. Layer
I prefer stirring everything together so rice stays submerged and cooks uniformly. Layering can leave dry pockets and uneven texture.
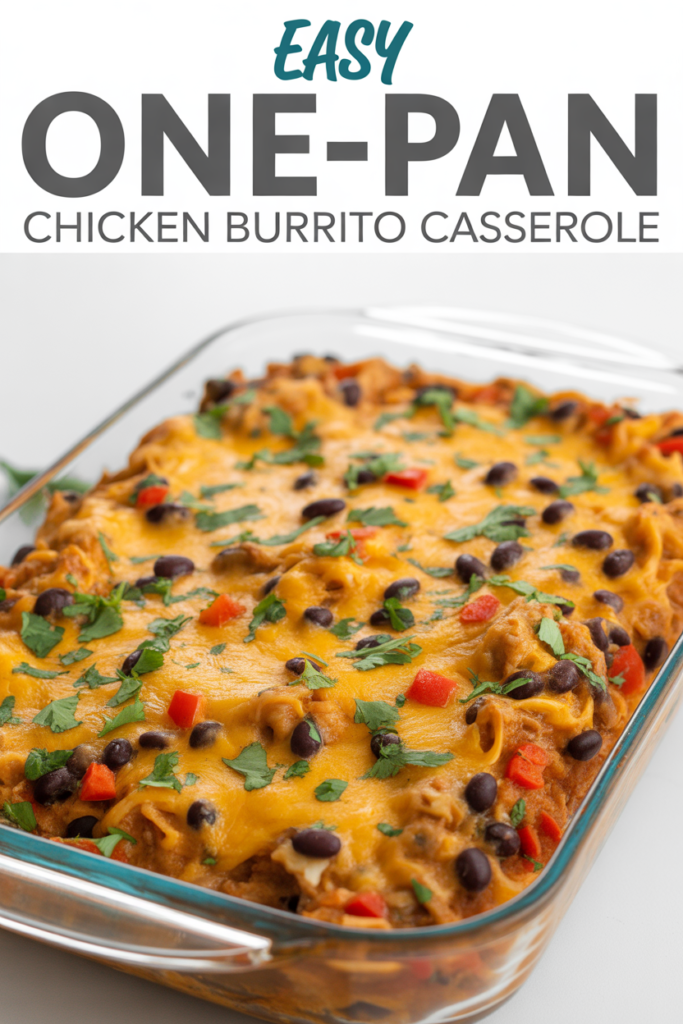
Bake, finish, and rest
Cover tightly with foil and bake in the oven about 65–70 minutes, until the liquid is absorbed and rice is tender but moist. Remove foil, scatter cheese, and bake 5–10 more minutes until melted and lightly golden.
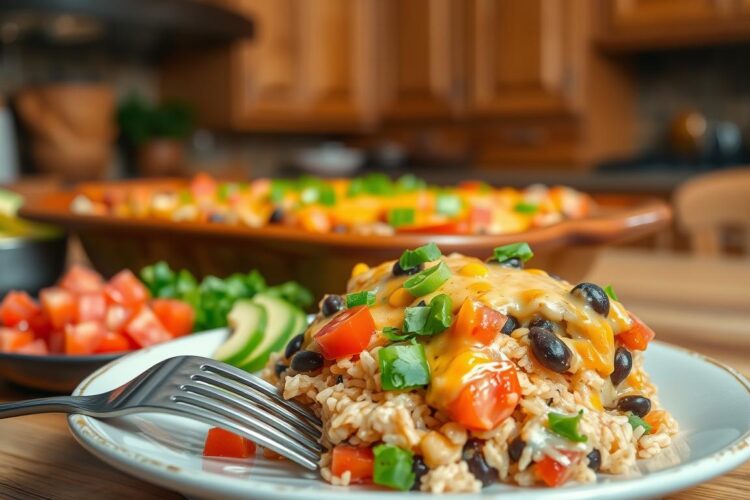
Let it cool for 5–10 cool minutes so the dish sets for cleaner slices. Serve portions topped with cilantro, green onion, avocado, salsa, or sour cream as your favorite toppings.
| Step | Action | Time (minutes) |
|---|---|---|
| Preheat | Heat oven to 400°F | 10–15 |
| Prep & mix | Chop, measure, stir rice/veggies/seasoning, add broth mixture | 10–15 |
| Bake covered | Bake until liquid absorbed and rice tender | 65–70 |
| Cheese finish & rest | Add cheese, bake 5–10; cool 5–10 minutes | 10–20 |
Timing, Texture, and Flavor Tips So It Turns Out Right
Getting the timing right is the trickiest part of a baked rice dish, but simple checks make it predictable. Watch the last stretch in the oven and test early so you don’t over- or undercook the grain.
If it looks soupy, what I do (and why it happens)
Soupy results usually mean the rice needs more time. I stir gently to redistribute liquid, cover again, and return the dish to the oven, checking every 5–10 minutes until the liquid is absorbed.
Why this happens: ovens vary, dish depth changes evaporation, and thicker layers slow cooking. A quick stir helps the grains catch up without overcooking the top.
How rice type affects bake time
Long-grain white rice generally finishes sooner; parboiled brown often needs the full bake window. If you use brown rice, plan extra minutes and a tighter cover to trap steam.
| Rice type | Approx bake minutes | Quick tip |
|---|---|---|
| Long-grain white | 60–70 minutes | Check at 60; stir if needed |
| Parboiled brown | 70–85 minutes | Expect more time; keep covered |
| Cauliflower rice | 20–30 minutes | Reduce liquid; watch closely |
Easy ways to boost flavor without adding heat
For deeper flavor I also use extra garlic, an extra teaspoon of cumin or oregano, or a spoonful of tomato paste. Finish with fresh cilantro and a squeeze of lime for bright contrast.
How to add heat: cayenne, jalapeños, hot salsa, or Sriracha
To spice it up, I add cayenne to the seasoning or stir in diced jalapeños before baking. Hot salsa or a swirl of Sriracha in each bowl is an easy, controllable finish.
To keep the dish lighter in fat, I use reduced-fat cheese or a bit less cheese and add creaminess with sliced avocado at serving.
Healthy Customizations for Different Diets and Preferences
I tweak this recipe often so it fits diets from low-carb to vegetarian without extra work. The core method stays the same: build the dish, bake, then finish with melted cheese or a creamy topping.
Low-carb option with cauliflower rice
Swap uncooked long-grain rice for riced cauliflower to cut carbs. Reduce broth by about two-thirds because cauliflower doesn’t absorb liquid.
Bake time falls to about 20–30 minutes. Check at 15 minutes so the vegetables stay bright and not soggy.
Dairy-free or lighter cheese choices
Use dairy-free shredded cheese or skip it and add sliced avocado at serving for richness. A dairy-free crema or a spoon of plain yogurt (or coconut cream) gives similar cream without heavy cheese.
Vegetarian swaps that still satisfy
Double the black beans and add pinto beans or a plant-based “chicken” substitute. Keep the same seasoning so the flavor profile stays bold and familiar.
Easy protein swaps
If I’m out of chicken, I also use shredded turkey, pre-cooked ground beef taco meat, or shredded pork. Each option shifts the flavor but not the method.
- Tortilla-style: layer corn or flour tortillas for a wrap-like bake (use certified gluten-free tortillas to keep it gluten-free).
- Keep bake and finish steps the same—customizing won’t add dishes or time.
| Swap | Key adjustment | Result |
|---|---|---|
| Cauliflower rice | Reduce broth; shorten bake | Low-carb, lighter texture |
| Dairy-free cheese/crema | Skip cheese or use alternatives | Still creamy at serving |
| Beans or plant-based protein | Increase beans or use vegan chicken | Hearty, vegetarian-friendly |
How I Serve Chicken Burrito Casserole (Toppings and Sides)
I serve this warm, cheesy dish with a small topping bar so everyone can pick what they like. Little bowls make it fun for kids and easy for meal prep.
My go-to toppings
My favorite toppings are cilantro, sliced avocado, fresh salsa, and a dollop of sour cream. These add brightness, creaminess, and a fresh contrast to the baked flavors.
Crunchy add-ons
I set out tortilla chips and baked tortilla strips for dipping and scoopable texture. Crunch is great for kids and for anyone who likes a mix of soft and crisp bites.
Simple sides for family dinner
Quick sides keep dinner balanced: a tossed green salad, a tangy slaw, or a simple corn salad. Each side takes minutes and adds color and crunch to the plate.
- Build-your-own idea: serve bowls so each person adds salsa, sour cream, jalapeños, pico, or lime wedges to taste.
- Handheld option: warm a tortilla and tuck a scoop inside for an easy wrap if someone prefers a handheld meal.
- Meal-prep tip: store toppings separately so portions reheat well and stay fresh for lunches.
| Topping | Why it works | Best paired with |
|---|---|---|
| Cilantro | Fresh, herbaceous lift | Salad or corn side |
| Avocado | Creamy richness without heat | Sour cream or salsa |
| Salsa | Acid and brightness to cut richness | Tortilla chips or a bowl scoop |
| Sour cream | Cool finish and smooth texture | Spicy add-ons or lime wedges |
These simple choices keep the meal approachable and let the main chicken burrito casserole shine. The result is an easy family dinner full of familiar flavors and quick swaps for every appetite.
Meal Prep and Storage: Fridge, Freezer, and Reheating
Once cooled, I turn the full bake into individual portions to simplify a week’s worth of meals. This makes grabbing a ready meal fast and keeps flavors consistent in every serving.
How I portion it for meal prep containers
I scoop even amounts into meal prep containers so each bowl has chicken, rice, beans, and cheese. Label containers with the date so you track freshness and rotate servings easily.
Fridge storage in an airtight container (best timeline)
For short-term storage I transfer leftovers to an airtight container and refrigerate. The dish stays best for 3–4 days before quality drops.
Freezer instructions and how to thaw overnight
I cool completely, pack portions into freezer-safe airtight containers, and freeze up to 3 months. Thaw overnight in the fridge for easiest reheating and even thawing.
Reheating tips so it stays moist and cheesy
To reheat a single meal, add a splash of broth or water, cover loosely, and microwave in short bursts until hot—about 3–4 minutes total, checking and stirring. For larger amounts I return the thawed portion to the baking dish, cover, and warm in a 350°F oven until heated through.
| Storage | Method | Keep for |
|---|---|---|
| Fridge | Airtight container | 3–4 days |
| Freezer | Freezer-safe airtight container | 1–3 months |
| Reheat | Microwave or baking dish | 3–4 minutes (single) / 20–30 minutes oven |
To bring back a freshly baked feel, sprinkle extra cheese on top and warm until melted. Finish with cold toppings like salsa or sour cream so each serving tastes bright and fresh.
Make It Tonight and Make Tomorrow Easier, Too
You can have bold, familiar flavors on the table fast using a single baking dish and simple swaps. I lean on this chicken burrito style bake for busy weeknights because it’s gluten-free friendly, healthy, and easy to scale for a crowd.
Mix, bake in the oven, add cheese, and let it rest 5–10 minutes — that pause firms the dish and makes slicing neat. The main flavor drivers are seasoning, peppers, black beans, broth, and tomato paste, so don’t skip them.
Choose cheese levels to control fat, or use avocado and salsa for richness without extra fat. Make it tonight with leftover chicken or a rotisserie option, and save the recipe for meal prep — it reheats well for tomorrow’s lunch.