
This post contains affiliate links. I may earn a commission if you purchase through them at no extra cost to you.
I call this my go-to low carb soup for busy weeknights. It delivers big cheeseburger flavor in about 30 minutes without fuss.
I start by crisping bacon, then brown ground beef with onion, celery, and garlic. I melt in cream cheese and shredded sharp cheddar, add beef broth and heavy cream, and stir until silky.
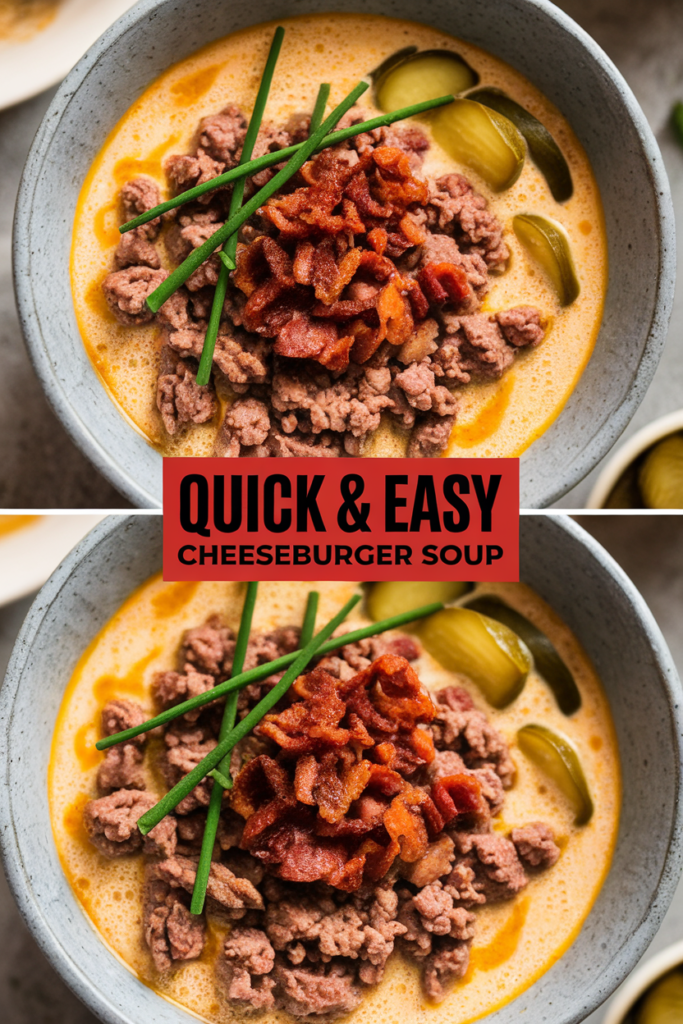
The result is a warm orange-yellow bowl of comfort — rich in fat and protein, low in carbs. Top with extra cheese, crispy bacon, dill pickles, and chives to get that classic tang. This simple recipe feels indulgent but stays practical for weeknight dinners and meal prep.
Why I Crave This Cozy, Low-Carb Bowl on Busy Weeknights
When weeknights get crazy, I reach for a warm bowl that tastes like a burger without the bun. It gives the same savory satisfaction as a late-night order, but in about thirty minutes and with fewer carbs.
I make it all in one pot, so cleanup is quick and I can sit down to eat sooner. The creamy base and browned ground meat lock in rich flavor, while tangy toppings add that classic punch.

All the classic flavors, hold the bun
- Juicy ground beef, sharp cheese, and dill pickles deliver the carb cheeseburger vibe without bread.
- A sprinkle of crispy bacon and chopped pickles turns the bowl into a true burger experience.
Ready in about 30 minutes for fast comfort
- The timeline is real: crisp bacon, brown the ground meat with onion, melt cheeses, then add broth and cream.
- It’s forgiving time-wise—cheese melts fast and the pot heats up quickly, so dinner is ready in minutes.
- For variations, I swap ground beef for chicken or add cauliflower for a veggie boost when I want to change things up.
What Keto Cheeseburger Soup Tastes Like
This dish translates classic burger elements into a warm, spoonable bowl. The overall flavor is familiar and nostalgic, but the texture makes it extra cozy on cold nights.

Creamy orange-yellow broth with melted cheddar
The broth is velvety and thick from cream cheese and cream. Melted cheddar gives that signature orange-yellow hue and a smooth, clingy mouthfeel.
Savory seasoned ground beef and crispy bacon
Every spoonful carries well-seasoned ground beef that balances the dairy base. I add crispy bacon for a smoky crunch that plays off the melted cheese.
Bright, tangy finish from dill pickles and fresh chives
Dill pickles cut through the richness with a bright snap. Fresh chives add a mild onion lift that keeps the bowl lively.
- The broth looks and tastes like comfort in a bowl.
- Rich cream and shredded cheddar melt into a silky texture that doesn’t split when warmed gently.
- I serve it hot so the cool pickles and chives release aroma without chilling the soup.
Keto Cheeseburger Soup Ingredients
Here’s a clear ingredient list that lets you build this rich, burger-flavored bowl quickly.
Beef and aromatics
I use 1 pound ground beef (80/20 for flavor; 93% lean if you want less fat).
Add 1/2 cup diced onion and 1/2 cup diced celery for depth.
Stir in 1 clove minced garlic, 1 teaspoon kosher salt, and 1/2 teaspoon black pepper.
Optional dried herbs: 1 teaspoon each oregano, basil, and parsley.
Cheesy, creamy base
For the base, cube 4 ounces cream cheese (up to 8 ounces for extra creaminess).
Shred 1 1/2 to 2 cups sharp cheddar cheese for the best melt.
Use 2 to 3 cups low-sodium beef broth — or chicken broth for a lighter profile.
Finish with 1 cup heavy cream. Optional: 1 tablespoon tomato paste and 1–2 tablespoons sour cream off heat.
Toppings that make it sing
Top each bowl with 6–8 slices crispy bacon, about 1/2 cup chopped dill pickles, and a handful of fresh chives or green onions.
These give the classic bacon cheeseburger notes and bright contrast to the rich broth.
| Ingredient | Amount | Purpose |
|---|---|---|
| Ground beef | 1 lb | Main protein and savory base |
| Cream cheese | 4–8 oz | Thickens and adds creaminess |
| Shredded cheddar | 1.5–2 cups | Sharp flavor and smooth melt |
| Beef broth | 2–3 cups | Adjusts soup thickness and salt |
Tools I Use for the Best Results
I rely on a few simple tools to make this bowl turn out perfectly every time. Keeping gear minimal makes prep faster and cleanup easy. These items help me get a silky finish without fuss.
Essential cookware and why they matter
I reach for a heavy dutch oven or sturdy pot so the ground beef browns evenly and the dairy base warms without hot spots. Even browning builds flavor and prevents scorching when I raise the heat.
Tools that save time and keep texture smooth
- A reliable whisk melts cream cheese into the hot broth for a lump-free, silky texture.
- A flat-edged wooden spoon scrapes fond after browning to deepen the flavor.
- Measuring cups and spoons keep broth-to-cream ratios right for the ideal thickness in this soup recipe.
- Tongs or a slotted spoon remove crisp bacon so it stays crunchy for topping.
- Pre-shredded cheddar and cubed cream cheese cut minutes from prep when I’m short on time.
- A ladle with a pour spout helps portion into containers without spills.
| Tool | Use | Why it helps |
|---|---|---|
| Dutch oven | Browning & simmering | Even heat prevents burning and keeps dairy stable |
| Whisk | Emulsifying | Removes lumps for a creamy finish |
| Ladle | Serving | Neat portions in bowls or storage containers |
How I Cook It Step by Step
I keep the process tight so dinner is done in about thirty minutes. The cues are simple: crisp, brown, melt, and warm through. Use a heavy dutch oven or a wide pot to get even heat and an easy finish.
-
Crisp the bacon first and set it aside
In a dutch oven over medium heat cook 6–8 diced bacon slices for 8–10 minutes until crisp. Transfer to a towel-lined plate and pour off most fat, leaving about 1 tablespoon in the pot.
-
Brown the ground beef with onions and celery; add garlic
Add 1 lb ground beef, 1/2 cup diced onions, and 1/2 cup diced celery. Cook 6–8 minutes, breaking up the ground until browned and the onions are soft. Stir in 1 minced garlic clove for 30 seconds.
-
Season, then stir in cream cheese until silky
Season with 1 teaspoon kosher salt and 1/2 teaspoon black pepper. Reduce heat to medium-low and stir in 4 ounces cubed cream cheese until smooth, about 2–3 minutes.
-
Blend in tomato paste and pour in beef broth
Stir in 1 tablespoon tomato paste if using. Pour 2–3 cups low-sodium beef broth, scraping browned bits from the pot to enrich the base.
-
Melt in shredded cheddar, then finish with heavy cream
Add 1 1/2–2 cups shredded cheddar and stir until melted. Pour in 1 cup heavy cream and warm over low heat until steaming—do not boil.
-
Ladle and top with bacon, pickles, extra cheddar, and chives
Taste and adjust salt and pepper. Ladle into bowls and top with reserved bacon, extra shredded cheddar, chopped dill pickles, and fresh chives.
| Step | Time | Heat Cue |
|---|---|---|
| Crisp bacon | 8–10 minutes | Medium, sizzling |
| Brown ground | 6–8 minutes | Medium-high, no pink |
| Warm cream | 2–3 minutes | Low, steaming only |
Cheeseburger Toppings That Take It Over the Top
The right garnishes lift this bowl from tasty to unforgettable. I focus on contrast: smoky crunch, bright tang, melty cheese, and a fresh herb note.
Crispy bacon and extra sharp cheddar
I pile on crispy bacon for a smoky crunch that signals bacon cheeseburger goodness in every spoonful.
A sprinkle of extra sharp cheddar cheese melts slightly into the hot surface and deepens the savory flavor.
Dill pickles for tang and crunch
Dill pickles add that signature burger-shop tang and a refreshing crunch that balances the rich base.
I chop them small so each bite gets a hit of acid and texture.
Fresh chives or green onions
Fresh chives or thinly sliced green onions bring a bright, herbaceous pop.
They add a mild allium lift without overpowering the core flavor.
Optional heat: red pepper flakes
A pinch of red pepper flakes gives gentle heat and a lift that doesn’t steal the show.
For a crowd, I set up a topping bar so everyone can customize their bowl.
- Smoky bacon: crunch and depth
- Extra cheddar cheese: melty richness
- Dill pickles: tangy contrast
- Chives/green onions: fresh brightness
- Red pepper flakes: mild heat
| Topping | Purpose | Suggested Amount |
|---|---|---|
| Crispy bacon | Smoky crunch | 6–8 slices, crumbled |
| Shredded cheddar cheese | Melty, savory boost | 2 tbsp per bowl |
| Dill pickles | Tangy crunch | 1/4 cup, chopped |
| Chives / green onions | Herbaceous lift | 1 tbsp, thinly sliced |
My Pro Tips for Ultra-Creamy, Low-Carb Success
A couple of quick tricks keep the cream base glossy and lump-free from start to finish. I focus on timing, ingredient temperature, and gentle heat to get a restaurant-style finish at home.
Shred your own cheddar for the smoothest melt
I always shred cheddar myself because pre-shredded packs often include anti-caking agents. Those additives stop the cheese from melting into a silky binder.
Use low-sodium broth and salt to taste
Choosing low-sodium broth gives me control over seasoning. I wait until the end to add salt since cheese already brings saltiness.
Room-temp cream cheese melts faster and creamier
Bring cream cheese to room temperature before adding it to the pot. It blends quickly and avoids lumps that ruin the texture.
- I warm the soup gently and never let it boil after dairy goes in; low heat keeps the finish glossy.
- For net carbs control, I skip flour thickeners and rely on cream cheese and cheese for body.
- If the pot is too thick, loosen it with a splash of warm broth; if thin, melt in a bit more cheese off heat.
- Generous garnishes—bacon, pickles, and chives—deliver the full burger flavor even while staying keto-minded.
| Tip | Why it matters | Quick fix |
|---|---|---|
| Shred your own shredded cheddar | Better melt, no grainy bits | Use a box grater; shred cold cheese for neat strands |
| Low-sodium broth | Control final seasoning | Salt last, taste as you go |
| Room-temp cream cheese | Smoother, faster incorporation | Set out 30 minutes before cooking |
Variations and Swaps to Match Your Macros
I often change one or two ingredients so the dish fits my macro targets without losing the core taste. Small swaps let me shape calories, fat, and carbs for any day of the week.
Protein switch: ground turkey or chicken
For a leaner bowl I swap ground turkey or chicken in place of beef. The method and seasonings stay the same, so timing and texture remain familiar.
Add-ins: cauliflower rice or broccoli florets
To add volume with low carbs, I stir in 1 to 2 cups cauliflower rice or a couple of cups small broccoli florets near the end. They bulk the pot without raising the carb load much.
Flavor boosts: Worcestershire, dry mustard, and smoke
A teaspoon of Worcestershire or 1/2 teaspoon dry mustard deepens savory notes. A pinch of smoked paprika or a few dashes of hot sauce gives a pleasant smoky lift.
Slow cooker option for hands-off cooking
For set-and-forget meals I brown meat and onions, then add broth, cubed cream cheese, and tomato paste to the crock. Cook on high 3–4 hours or low 6–7 hours. Stir in cheddar and cream just before serving.
- I sometimes fold some crisp bacon into the pot and save the rest for topping to boost bacon cheeseburger aroma.
- I adjust cheese and cream to hit fat or carb targets, keeping the bowl flexible for meal prep.
| Swap | Why | Timing or Amount |
|---|---|---|
| Ground chicken / turkey | Leaner protein option | Use same browning step, 1 lb |
| Cauliflower rice / broccoli | Low-carb volume | 1–2 cups, add near end |
| Worcestershire / dry mustard | Deeper savory flavor | 1 tsp Worcestershire, 1/2 tsp mustard |
Storage, Reheating, and Keto Meal Prep
Storing and reheating this hearty bowl is simple, which makes it ideal for weekday meal prep. I portion the soup into airtight containers and refrigerate for 3-4 days so lunches and dinners are ready to grab.
I reheat gently in a pot over medium heat, stirring often until hot. Keep the heat low and never let it boil; that protects the dairy base and keeps the texture silky.
Microwave reheating works too. I heat one cup at a time for 1-2 minutes, stirring halfway so warmth spreads evenly. If the pot gets thick after chilling, a splash of warm broth loosens it quickly.
- I store toppings—bacon, pickles, and onions—separately and add them after reheating so they stay crisp.
- Portion into 1- to 1.5-cup servings for fast grab-and-heat meals.
- I skip the freezer for dairy-heavy soups; freezing often makes creams and cheeses separate and change texture.
| Storage | How long | Best practice |
|---|---|---|
| Fridge | 3–4 days | Airtight containers, cool before sealing |
| Reheat (stove) | Minutes until hot | Warm in a pot over medium, stir often |
| Freezer | Not recommended | Dairy-based soups separate after thawing |
Macros and Nutrition at a Glance
I size servings to hit a solid balance of protein and fat while keeping net carbs low. That makes this bowl filling and easy to fit into a low carb plan.
Low net carbs, high fat, and satisfying protein per serving
Each serving delivers steady protein and a generous dose of fat for lasting fullness. I rely on cream cheese and shredded cheddar to thicken rather than flour, so net carbs stay minimal.
- I use low-sodium broth and salt to taste so cheese doesn’t push sodium too high.
- Swap to leaner beef or light cream cheese to trim calories without changing method.
- Portion is important: I aim for about 1 to 1 1/2 cups per serving to match my macros and hunger.
| Measure | Notes | Typical |
|---|---|---|
| Protein | Satisfying, keeps you full | Good per serving |
| Fat | Primary calorie source for satiety | Generous amount |
| Net carbs | Kept low using dairy thickeners | Low |
| Seasoning | Adjust with salt and pepper | Salt & pepper to taste |
For exact tracking, I plug in your brands and amounts. That way the numbers match your targets and this keto cheeseburger soup fits cleanly into meal prep.
Ready to Warm Up with a Bowl Tonight?
Tonight, let a single pot bring smoky bacon, melty cheese, and browned ground beef to your table. I can have this keto cheeseburger soup on the stove and ready in about 30 minutes with minimal cleanup.
Top each bowl with crispy bacon, chopped pickles, and a sprinkle of cheddar for that bacon cheeseburger feel in spoonable form. The browned ground adds savory bite while the creamy base keeps every mouthful cozy.
This recipe reheats beautifully for lunches, so I make a double batch when I plan ahead. Warm gently, add a splash of broth if it thickened, and finish with fresh toppings just before serving.
Grab your Dutch oven, brown the beef, melt in the cheese, and enjoy a fast, low‑carb weeknight hit. I think you’ll reach for this cheeseburger soup keto bowl again and again.