This post contains affiliate links. I may earn a commission if you purchase through them at no extra cost to you.

I promise a bold, comforting twist on a classic one-dish supper. This is my smoky, creamy, cheesy take that layers tangy seasoning with sticky sauce for an over-the-top result.
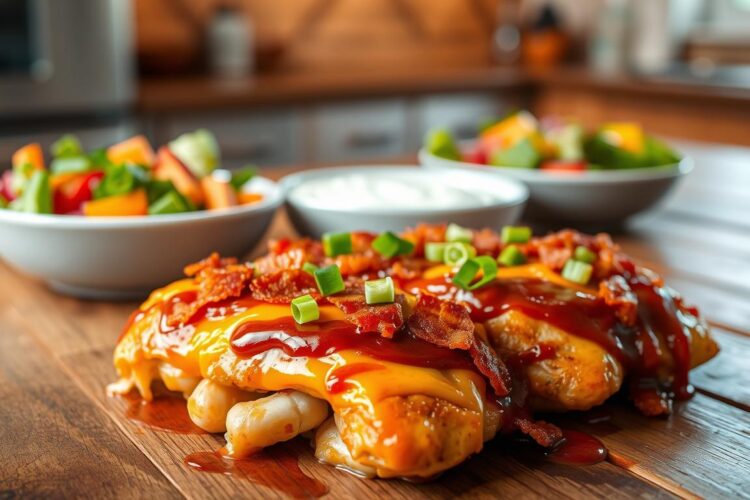
The end dish is bubbly and saucy, with melted cheese and crisped bacon bits that add texture. You get a punchy, smoky-sweet flavor that makes every bite feel indulgent.
This easy recipe cooks in one pan and serves like a casserole, even though it starts with chicken breasts. Prep can be about 10 minutes, then bake at 350°F for a gentler cook or 400°F for a faster finish; I explain timing later.
I reach for this dish when my family needs a reliable, family friendly dinner. The ingredient list is pantry-simple: sauce, ranch seasoning, bacon, cheddar or Colby Jack, oil, salt and pepper, and parsley. What sets it apart is the combo of ranch spice plus sauce, bacon, and melted cheese for a bolder BBQ ranch chicken flavor than usual.
Why I Love This BBQ Ranch Chicken for Busy Weeknights
This one-dish meal is my go-to when I want bold taste without a lot of fuss. It feels like comfort food but takes almost no hands-on time. I can scale it for two or a crowd and still get the same cozy result.

Smoky, creamy, cheesy, and packed with flavor
On first bite I get smoky bacon notes, tangy-sweet sauce, and a subtle herby kick from the ranch seasoning. A golden, melty cheese crust ties everything together.
The texture is what hooks me: juicy chicken beneath a thick, gooey top. That contrast makes the dish feel indulgent without a complicated casserole base.
A bold twist on classic bacon cheddar
Think of this as familiar bacon-cheddar fare with one small change that amps it up. The ranch seasoning adds savory, herby depth so the sauce feels layered instead of one-note.
That little tweak makes the whole tray taste bigger and more craveable while staying easy to pull off on a weeknight.
Why this is my go-to family friendly dinner
Kids and picky eaters warm to the usual combo of sauce, bacon, and melted cheese, and the ranch stays gentle in the background. I love that minimal chopping and mostly oven time get dinner on the table fast.
- Pairs with rice, potatoes, or a simple salad.
- Scales easily for leftovers or more mouths.
- One dish, easy cleanup—perfect for a busy evening.
What to Expect: Timing, Oven Temp, and Baking Dish Setup
A simple plan helps the whole meal come together. I follow a two-stage approach so the meat cooks through first, then the sauce and cheese finish on top.

Prep time and bake time (what I plan for in real life)
Realistic prep takes about 10 minutes: grease the dish, season the meat, and measure sauce and toppings.
My typical schedule is a 30-minute first roast, then add sauce and return to the oven for another 5–15 minutes. That gives you a clear cook time window and predictable results.
Choosing 350°F vs 400°F depending on your schedule
I preheat oven to 350°F when I want a gentler cook. That usually runs about 30 minutes, then 10–15 more minutes after saucing to finish.
When I’m short on time I preheat oven to 400°F. The first 30 minutes is similar, then a quick 5–15 minutes after topping melts the cheese faster and crisps edges.
Best dish size and why I grease it (or use a little olive oil)
I use a 9×13-inch baking dish for four breasts—spacing helps even cooking and browning. Crowding lengthens the cook time and can steam the topping.
I grease the pan to prevent sticking, aid sauce coverage, and make cleanup easier. Sometimes I slick a little olive oil instead of spray.
- Your cook time varies with breast thickness, oven differences, and dish material—use a thermometer to be sure.
- Start on the upper rack briefly if you want crisped edges, then move to center to finish melting evenly.
Ingredients I Use for BBQ Bacon Ranch Chicken Bake
Here’s the exact ingredient list I rely on for a reliably flavorful tray dinner. I give measurements so you can shop and prep quickly. I use similar-sized breasts to keep the cook time even.
Core ingredients
- 4 boneless, skinless chicken breasts (about 1 1/2 to 2 lbs total)
- 3/4 cup BBQ sauce (enough to generously coat each breast; brand controls sweetness)
- 6 slices cooked bacon, crumbled (cook until edges crisp to avoid greasy pooling)
- 1 1/2 cups shredded sharp cheddar or Colby Jack cheese
- 1 tablespoon ranch seasoning (packet or measured tablespoons)
Basics and finish
- 1 tablespoon olive oil (helps seasoning adhere)
- 1 teaspoon salt and 1/2 teaspoon black pepper (adjust to taste)
- 2 tablespoons chopped parsley for garnish
| Ingredient | Amount | Why I use it |
|---|---|---|
| Boneless breasts | 4 pieces | Even cooking and easy slicing for serving |
| BBQ sauce | 3/4 cup | Provides the tangy-sweet base flavor |
| Cooked bacon | 6 slices, crumbled | Crisp texture and smoky notes without excess grease |
| Shredded cheese | 1 1/2 cups | Melts into a bubbly, golden top |
| Ranch seasoning | 1 tbsp | Key to the herby, savory profile |
Optional Add-Ins and Easy Swaps (Without Losing the Ranch BBQ Flavor)
Want to tweak the tray without losing the signature tang? Small swaps and a few add-ins let you shift texture and richness without changing the method.
Cheese choices that stand up to bold topping
I reach for sharp cheddar when I want punch. Colby Jack melts extra-smooth, and a blend gives a cheesier top.
Pre-shredded speeds things up, but freshly shredded cheese melts a little better if you have time.
Bacon handling and slice tips
For crispy bits, I cook bacon slices separately and crumble them on at the end.
If I want less fuss, I let the slices bake with the meat and add less at the finish.
Sauce paths and a note on dressing
Classic, honey, spicy, or smoky sauce each nudges the final flavors a different way.
I prefer seasoning over a full dressing in the mix, but a light drizzle after baking adds creaminess.
Make it casserole-style with onions or potatoes
Dice onions or small potatoes and toss in a bowl with oil, salt, and pepper. Spread them under the meat so they roast evenly.
One small rule: add too many extras and you may need a touch more sauce and seasoning to keep the flavors balanced.
| Add-in | Method | Effect |
|---|---|---|
| Sharp cheddar | Top at finish | Bold, tangy melt |
| Bacon slices | Cook separate or with dish | Crisp vs. convenient |
| Onions / potatoes | Toss in bowl first | Turns tray into casserole |
How I Make This Bacon Ranch Chicken Bake Step by Step
I share a clear, step-by-step method so you can preheat oven and work confidently while the dish comes together.
Preheat the oven and prep the baking dish
I preheat oven to 350°F (or 400°F when short on time). While it warms, I grease a 9×13-inch dish; this keeps the tray tidy and helps the sauce spread.
Sometimes I line the dish with foil to speed cleanup or to shield the top if it browns too fast.
Season the chicken
I rub each breast with olive oil, then sprinkle ranch seasoning, salt, and pepper. This builds flavor in the meat, not just on top.
For thick breasts I butterfly them so they cook evenly and shave off a few bake minutes.
First bake: cook until nearly done
I lay the chicken in the greased dish and bake about 30 minutes. I look for opaque edges and juices that run clear as the visual cue the meat is nearly cooked.
Top it: sauce first, then bacon, then cheese
Hot chicken holds sauce better, so I spoon sauce over each breast first. Then I add crumbled bacon and finish with shredded cheese to seal the flavors.
If I pre-cook the bacon it stays crisp; otherwise I add slices near the end so they don’t soften too much.
Final bake and finish
Return the dish to the oven for 5–15 minutes until the cheese is bubbly and golden and the center reaches a safe temp. Watch closely so the top doesn’t overbrown.
I let the tray rest for 5 minutes, then sprinkle chopped parsley. For a smaller household I make half the batch in a smaller dish and check timing a few minutes earlier.
| Step | Timing | What I watch for |
|---|---|---|
| Preheat & prep | 5–10 minutes | Oven at temp; dish greased or lined with foil |
| First bake | ~30 minutes | Chicken opaque at edges; juices run clear |
| Top and finish | 5–15 minutes | Cheese bubbly and golden; internal temp safe |
| Rest & serve | 3–5 minutes | Juices settle; garnish with parsley |
Tips for Juicy Chicken and a Perfect Bubbly Cheese Top
A few simple tricks keep the meat moist and the cheese perfectly bubbly every time. I focus on even thickness, timing, and quick checks so the meal is reliable and forgiving.
Even thickness for steady cook time
For thick breasts I butterfly them so each piece is the same thickness. That shortens total cook time and helps the meat stay juicy.
When to add the cheese
I spoon sauce on and return the dish to the oven before adding cheese. I only top once the meat is nearly done so the cheese melts without getting greasy or tough.
How I judge doneness
Follow the thermometer, not the clock. I look for clear juices, no pink at the thickest part, and an internal temp at or near 165°F.
Control browning and cleanup
If the top browns too fast, I tent loosely with foil for a few minutes. Grease the dish and avoid overfilling so cleanup stays simple.
- I add a pinch more black pepper when my sauce is sweet to balance flavor.
- Remember: the protein is filling and the fat from cheese and meat adds richness—serve with sides that add freshness.
| Issue | Fix | Why it works |
|---|---|---|
| Thick breasts | Butterfly to even thickness | Shortens cook time and prevents dry meat |
| Overbrowned top | Tent with foil | Protects cheese while interior finishes |
| Uncertain doneness | Use instant-read thermometer | Reliable internal temp check; avoid guesswork |
How I Serve This Easy Chicken Casserole
I love turning this tray into a hearty family-style main that pairs with fresh, simple sides. It plates cleanly and makes it easy to build a full meal for weeknights.
Classic pairings
I often serve the casserole with steamed rice or roasted potatoes. Both soak up the sauce and balance the rich flavors.
Green beans or a simple salad add texture and brightness. These greens cut through the richness and make the meal feel complete for my family.
BBQ plate vibes
For a picnic-style feel, I set out coleslaw, pickles, and corn. The tang and crunch balance the bacon ranch topping and add contrast on the plate.
Family-friendly ideas
I slice the breasts for picky kids so every bite has sauce and cheese. For sandwiches, I pile the warm filling on a toasted bun—no extra cooking needed.
Leftovers work great chopped into salads, nachos, or tacos for easy lunches and second-night meals.
| Serving option | Why it works | Quick prep tip |
|---|---|---|
| Rice or mashed potatoes | Absorbs sauce; comforts picky eaters | Use leftover mashed potatoes or instant rice to save time |
| Green beans or salad | Adds freshness and lightness | Toss greens with lemon and olive oil just before serving |
| Coleslaw, pickles, corn | Provides crunch and tang to cut richness | Make slaw ahead; chill until serving |
| Toasted bun or chopped leftovers | Turns the dinner into sandwiches or quick lunches | Warm fillings briefly under the broiler before assembling |
Portioning note: plan one breast per hungry adult, or split breasts for kids and add extra sides. This is an easy way to stretch meals while keeping everyone satisfied.
Storage, Reheating, and Make-Ahead Notes for Leftovers
I keep a simple routine so this tray turns into fast, tasty meals later. I cool the pan briefly, portion into containers, and label them for easy grabs during the week.
I store leftovers in airtight containers in the fridge for up to about 4 days. If I line a container with foil first it makes cleanup faster and helps the sauce stay put.
How I store leftovers for quick lunches
I portion the meat and sauce with a little extra topping so the ranchy flavor stays. I sometimes set aside a few crumbled bacon pieces to sprinkle on after reheating for better texture.
Reheating without drying out the chicken
Microwave: heat 1–2 minutes, pause halfway, and add a splash of water or sauce if it looks dry. Oven: cover loosely with foil and reheat at 325°F until warmed through to keep juices.
Freezer strategy: what works best in my kitchen
I freeze cooked portions rather than assembling raw trays. It saves time later and the texture holds up better after thawing and reheating. This recipe refreezes well for stacked, wrapped portions when I need extra meal prep time.
| Storage | Length | Best tip |
|---|---|---|
| Fridge | Up to 4 days | Airtight containers |
| Freezer | 2–3 months | Freeze cooked portions |
| Reheat | Minutes vary | Microwave then broil briefly for crisp top |
.
More Cozy Chicken Dinner Recipes I’d Make If You Loved This One
When I want the same melty, savory comfort again, these recipes are my go-tos.
Try a creamy ranch chicken casserole that leans heavier on herbs and cheese for a smooth, cozy finish.
Make a bacon ranch-inspired tray with roasted vegetables under the meat for a one-dish supper that stretches farther.
For a saucy twist, try a sweet-savory BBQ skillet that uses the same sauce and cheese idea but cooks faster on the stovetop.
Turn leftovers into loaded nachos or warm wraps—shred the meat, sprinkle with cheese and extra sauce, then broil until bubbly.
Each option keeps the method simple and the flavor bold, so weeknight cooking stays reliable and family-friendly.