This post contains affiliate links. I may earn a commission if you purchase through them at no extra cost to you.
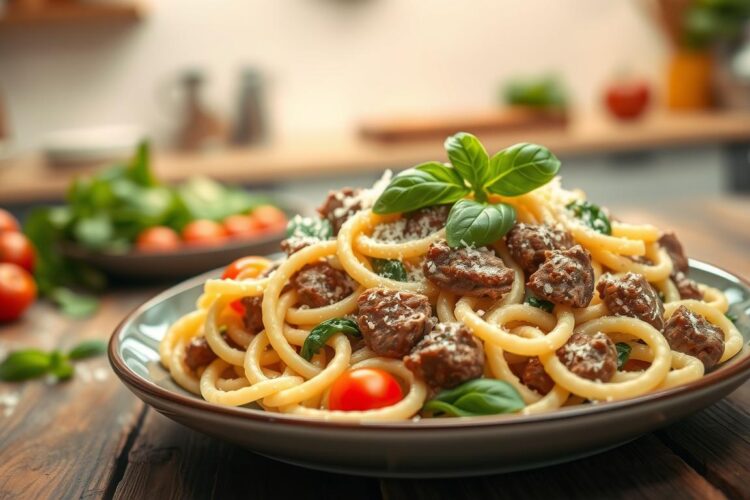
I keep this dish on repeat when I want comfort that still supports my protein goals. It pairs al dente penne with savory, browned lean beef and a glossy sauce that clings to each bite.
The method is fast: a one-skillet sauce simmers while the pasta cooks, so dinner is ready with minimal fuss. I use either heavy cream or Greek yogurt for a silky finish and share tips so the yogurt won’t curdle.
This is built for busy weeknights and meal prep. Depending on choices, servings can deliver about 47 grams of protein or roughly 38 grams, so it stays satisfying without feeling overly heavy.
I’ll give exact measurements, clear step-by-step instructions, and notes on storage and reheating so leftovers stay smooth. Read on and you’ll have a reliable, macro-friendly recipe to turn to any night.
Why I Make This Creamy, High-Protein Pasta on Busy Weeknights
When time is tight, this one-skillet meal gives me rich, comforting flavor without a long cook. I can choose lean meat and a lighter dairy swap to keep overall fat in check. That makes it feel indulgent and still sensible.
I love the glossy sauce payoff. A splash of reserved pasta water ties the sauce to the noodles so every bite is saucy but not greasy. It reads like comfort food while staying balanced on the plate.

Why it works for weeknights
I boil the pasta while I brown the meat and build the sauce in one skillet. The whole meal can be on the table in about 30 minutes.
Meal prep and leftovers
Flavors deepen overnight, so this is true meal prep gold. I watch grams protein per serving by using lean options or Greek yogurt instead of cream. Leftovers reheat well with a splash of water or milk so texture stays smooth.
| Option | Cook time | Estimated grams protein | Fat notes |
|---|---|---|---|
| Lean meat + Greek yogurt | 30 min | ~38–47 g per serving | Lower fat |
| Regular meat + cream | 30 min | ~47 g per serving | Higher fat, richer sauce |
| Meat swap (turkey/chicken) | 30 min | ~35–42 g per serving | Lean option |
| Plant-forward mix | 30 min | ~20–30 g per serving | Lower fat, more fiber |
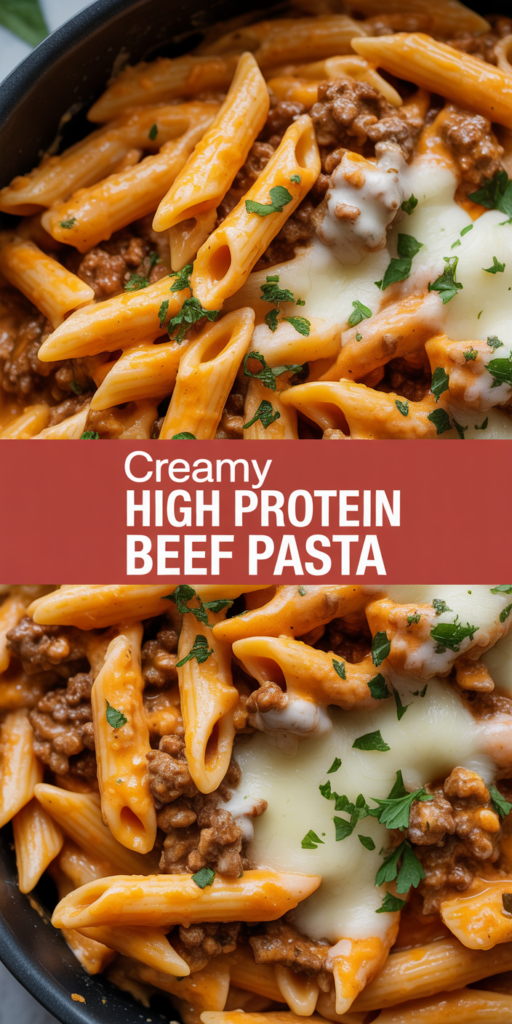
What Creamy High Protein Beef Pasta Tastes Like
You’ll notice deep caramelized flavor up front, then a gentle tomato tang that rounds each forkful. The browned meat and roasted garlic fill the kitchen and set a savory base that feels very satisfying.

A savory, browned base balanced with tomato and garlic
I let the meat form brown bits in a large skillet so those caramelized pieces flavor the whole pan. A bit of tomato paste cooks briefly to add richness without acidity. Fresh garlic warms the sauce and keeps it cozy.
A smooth, glossy sauce that coats every piece of penne
The sauce turns smooth creamy when I stir in reserved starchy pasta water and finish with melted cheese. That gives a glossy cling so each penne wears sauce, not a puddle.
Fresh parsley for a bright, herby finish
I finish with chopped parsley to cut through richness. A light grind of black pepper and a final pinch of salt sharpen the flavors so the dish never tastes flat.
| Component | Role | Technique |
|---|---|---|
| Browned meat | Savory backbone | Sear in a large skillet until caramelized |
| Tomato paste & tomato | Depth and balance | Cook briefly to deepen flavor |
| Cheese | Creaminess and gloss | Stir in at end to melt |
| Parsley | Fresh finish | Chop and sprinkle before serving |
Ingredients I Use (Exact Measurements)
Below are the precise measurements I use to get consistent results every time.
Pasta and protein
- Penne pasta — 8 oz (225 g). Use higher-protein pasta if you want more grams per serving.
- Lean ground beef — 1 lb (450 g). I pick lean so the sauce stays balanced and not greasy.
Aromatics and tomato base
- Olive oil — 1 tbsp
- Onion — 1 small, finely chopped
- Garlic — 2 cloves, minced
- Tomato paste — 2 tbsp (for bold flavor)
- Tomato sauce — 1 cup (or 1 cup beef broth as an option)
Creamy element and cheese
- Heavy cream — 1/2 cup OR full-fat Greek yogurt — 3/4 cup (Greek yogurt instead reduces fat and boosts tang; full-fat yogurt cuts curdling risk)
- Shredded mozzarella or mild white cheese — 1 cup, freshly shredded for smoother melting
Seasonings, oil, and finishing herbs
- Salt — 1 tsp (adjust to taste)
- Black pepper — 1/2 tsp
- Fresh parsley — 2 tbsp, chopped for garnish
- Reserve 1/2 cup pasta water as needed to loosen the sauce
| Ingredient | Amount | Purpose |
|---|---|---|
| Penne pasta | 225 g (8 oz) | Main carb, holds sauce |
| Lean ground beef | 450 g (1 lb) | Savory protein, less fat |
| Tomato paste + sauce | 2 tbsp + 1 cup | Depth and body for the sauce |
| Greek yogurt or cream | 3/4 cup or 1/2 cup | Creamy finish; yogurt instead for tang |
| Shredded cheese | 1 cup | Melts into sauce for gloss |
Kitchen Tools That Make This Recipe Fast
A few simple tools cut prep time and keep this weeknight meal moving smoothly. I name the items I use so your workflow stays calm and efficient.
Core gear I rely on
- I use a large pot for boiling the noodles without crowding them.
- A colander makes draining quick and tidy so I can finish the next step immediately.
- A large skillet is the workhorse for browning the meat and building the sauce fast.
How these tools speed each step
Using one big skillet means I don’t transfer the sauce between pans. That keeps cleanup low and flavor high.
A wide pan lets the meat sear rather than steam, so the brown bits form in just a few minutes and boost flavor.
I also keep measuring spoons and a cup handy for consistent tomato paste and cream or yogurt amounts. Tongs or a large spoon help me toss the noodles without breaking them.
| Tool | Purpose | Quick tip |
|---|---|---|
| Large pot | Boil pasta evenly | Use plenty of water and salt for best texture |
| Colander | Drain efficiently | Drain promptly to move to sauce step |
| Large skillet | Brown meat and finish sauce | Wide surface encourages fast caramelization |
How I Cook Penne Pasta to Al Dente (So It Doesn’t Turn Mushy)
A rolling boil and a generous pinch of salt are my first steps to penne that holds its bite.
Salted boiling water and timing for the perfect bite
I fill a large pot with plenty of water so the pasta moves freely. When it reaches a full, rolling boil I add the salt and then the penne.
- Bring the pot to a vigorous boil, add 1–2 tablespoons of salt, then stir in the pasta.
- Cook for the package time (usually 10–12 minutes), but start tasting at the lower end. I want a slight chew—al dente—so it won’t go mushy after mixing.
- While the pasta cooks for the final minutes, I keep the sauce on the stovetop and let it simmer so both finish together.
Why I always reserve pasta water for a glossy sauce
Before I drain, I scoop out 1/2 cup of the starchy water. Sometimes I take up to 1 cup if the sauce looks thick.
- I don’t rinse the pasta because the starch helps the sauce cling.
- When tossing, I add a splash of reserved water at a time to loosen the sauce and keep it glossy.
- That little water trick prevents dryness and helps every tube of pasta wear the sauce evenly.
| Step | Action | Why it matters |
|---|---|---|
| Boil | Use a big pot with salted water | Seasons pasta and prevents sticking |
| Time | Cook per package, taste at 10–12 minutes | Ensures al dente texture, avoids mush |
| Reserve | Save 1/2–1 cup water before draining | Use to thin and gloss the sauce |
How I Brown Lean Ground Beef for Maximum Flavor
A proper sear on the meat makes the sauce taste like it simmered all day, even when it didn’t.
Letting brown bits form
I heat a large skillet over medium-high heat and add a splash of oil. I spread the lean ground beef in one layer and let it sit without stirring for 2–3 minutes so caramelized brown bits develop.
When to add onion and garlic
Once the beef is mostly browned, I lower the heat slightly and stir in the onion, then the garlic a minute later. That keeps the garlic from burning and turning bitter.
Seasoning and draining excess fat
I season early with a pinch of black pepper and salt later to control moisture. If there’s excess fat from less-lean meat, I drain it so the creamy beef sauce won’t feel greasy.
- Heat pan over medium-high heat.
- Spread meat, let sit 2–3 minutes, then break up and cook 4–5 more minutes until deeply browned.
- Add onion, cook 2 minutes; add garlic, stir 30–60 seconds.
- Drain excess fat if needed, then return to pan to finish the sauce.
| Step | Heat | Why it matters |
|---|---|---|
| Sear | Medium-high | Creates brown bits for depth |
| Finish | Moderate | Prevents garlic from burning |
| Drain | Off heat | Keeps sauce balanced, not greasy |
Building the Creamy Beef Tomato Sauce Without Dryness
Building a sauce that stays glossy and never dry is the step that makes this dish feel restaurant-ready.
Cooking tomato paste to deepen flavor
I always cook tomato paste for 1–2 minutes before adding liquids. This removes the raw tinny edge and deepens the tomato color and sweetness.
Simmer time to thicken the sauce in minutes
After I add tomato sauce or broth, I let the pan simmer 3–5 minutes so the mixture reduces slightly. These simmer minutes thicken the base without drying it out.
Heavy cream vs. Greek yogurt instead
Cream gives classic richness and a velvety finish. Greek yogurt instead boosts protein and adds a bright tang that balances the tomato.
Low heat tips to prevent Greek yogurt from curdling
- Reduce heat to low before adding yogurt.
- Temper by stirring a spoonful of warm sauce into the yogurt, then return it to the pan.
- Stir continuously as it warms through to keep the texture even.
Using a splash of pasta water to keep it smooth and creamy
I use a small amount of reserved pasta water to loosen the beef sauce and scrape up browned bits. Add water a tablespoon at a time until the sauce looks smooth creamy and coats the back of a spoon.
| Finish | Effect | Tip |
|---|---|---|
| Cream | Richer mouthfeel | Add off heat, then warm gently |
| Greek yogurt | Tang, more protein | Temper and use low heat |
| Pasta water | Silky gloss, loosen | Add tablespoons as needed |
Combining Everything Evenly for Creamy Beef Pasta Success
When the sauce is ready, the single most important move is getting the noodles into the pan and tossing them until everything glows. This final join is the quickest way to make sure each tube is coated and every forkful is balanced.
Tossing until every piece is coated
Add the drained pasta straight into the skillet. Use tongs or a large spoon and fold gently so the sauce clings to each piece.
- Toss for about 30–45 seconds so the heat melds sauce and pasta.
- If the mix tightens, add a splash of reserved water a tablespoon at a time and keep tossing.
Finishing with shredded cheese so it melts just right
Lower heat to low and sprinkle shredded mozzarella or a mild white cheese over the pan. Stir continuously for 1–2 minutes until the cheese melts into a silky finish.
Do not let the pan sit on high; short gentle warming prevents clumps and helps the sauce stay smooth.
Final seasoning and a bright parsley finish
Taste and add salt only if needed. Grind in plenty of black pepper for warmth and lift.
Finish with chopped parsley for color and freshness so the beef pasta never feels one-note.
| Action | Timing | Why it matters |
|---|---|---|
| Add pasta to skillet | 30–45 seconds | Ensures even coating and heat balance |
| Use reserved water | 1–3 tbsp as needed | Loosens sauce without thinning flavor |
| Melt cheese | 1–2 minutes on low | Creates a glossy, smooth finish |
High-Protein Meal Prep, Storage, and Reheating (So It Stays Creamy)
I portion my batch into four equal containers so every lunch has the same nutrition and calories. This makes tracking grams per serving easy when I log protein and carbs.
How I portion it for meal prep and macros
I divide the finished pan into four airtight containers. Each container holds one balanced meal and roughly the same per serving protein the recipe promises.
I label containers with the date so I know when to eat them by. That keeps planning simple during a busy week.
How long I store leftovers in the fridge
I store leftovers in an airtight container in the fridge for up to 4 days. Flavors hold well and the texture stays satisfying in that window.
Microwave and stovetop reheat with water or milk to prevent dryness
For microwave reheating, I add 1–2 tablespoons of water or milk to the container. Heat in 30–45 second bursts, stirring between, until hot. This prevents the sauce from tightening and keeps texture smooth.
On the stovetop, I reheat on low with a splash of water or milk. Stir constantly until the creamy sauce comes back together—this takes just a few minutes.
Freezer notes and what to expect from a creamy sauce
You can freeze portions for 2–3 months, but a dairy-rich sauce may separate slightly after thawing. Thaw overnight in the fridge, then reheat gently while stirring to bring the texture back.
| Step | Timing | Liquid to add | Result |
|---|---|---|---|
| Fridge storage | Up to 4 days | None | Best flavor and texture |
| Microwave reheat | 30–45 seconds bursts | 1–2 tbsp water or milk | Even heat, prevents dryness |
| Stovetop reheat | 3–5 minutes on low | 1–3 tbsp water or milk | Restores glossy sauce |
| Freezer | 2–3 months | Thaw, then add liquid | May separate; texture returns with stirring |
Make It Yours: Easy Swaps and Add-Ins I Actually Use
I often swap ingredients so this weeknight meal fits whatever I have on hand. The same skillet method still works if I swap the main protein or add vegetables. These tweaks keep the dish simple and protein-forward without extra fuss.
Ground turkey or chicken for a lighter twist
When I want a lighter option, I use ground chicken or ground turkey. Both brown the same way and take the garlic and tomato base well.
I season them exactly like the original recipe so the sauce stays familiar and satisfying.
Extra veggies that fit the sauce
I add mushrooms, spinach, zucchini, or bell pepper. I sauté them first in a bit of olive oil so they don’t release too much moisture into the sauce.
Cook off excess water before combining so the final dish doesn’t turn thin. That keeps the texture rich and clingy.
- Protein swaps: ground turkey or chicken — same method, lighter result.
- Veggies: mushrooms, spinach, zucchini, bell pepper — sauté in olive oil first.
- Heat control: cook off moisture so the sauce stays thick.
Cheese and tomato tweaks for your ideal finish
I use shredded mozzarella, mild white cheddar, or an Italian blend depending on melt and flavor I want. Freshly shredded cheese melts smoother and keeps the texture even.
For tomato balance, add more tomato paste for intensity or more tomato sauce for a looser, saucier finish. If I swap in greek yogurt instead of cream, I lower the heat and fold it in at the end so it stays silky.
| Swap | Effect | Quick tip |
|---|---|---|
| Ground chicken/turkey | Lighter flavor, less fat | Brown well for flavor |
| Veggies (mushroom/spinach) | More volume, nutrients | Sauté in olive oil, drain excess |
| Greek yogurt or cheese choice | More protein or different melt | Add yogurt off heat; shred cheese fresh |
My Favorite Way to Serve This Creamy High Protein Beef Pasta Tonight
I like to serve this straight from the skillet while the cheese is melty and the sauce is glossy over each bite of pasta.
My simple plating move is a final sprinkle of chopped parsley and a grind of black pepper. If I want extra comfort, I add another handful of shredded cheese.
On the side I keep it easy: a crisp green salad or steamed broccoli balances the richness. Garlic bread is perfect for scooping up any extra tomato goodness in the pan.
This dish comes together in minutes on low heat for the final toss. It’s a protein-forward weeknight winner that still feels like comfort food.